 | How to: Submit your product feed to Google Shopping4 March 2014 | Cate |
Skill Level: Beginner
Before submitting your feed to Google you will need to make sure it is set up correctly first. Please read our How To: Enable Your Products To Be Listed On Google Shopping post if you haven't done so already.
Importing your feed via a Scheduled Fetch
The feed set up in your Bluepark website
- Go to the Admin > Files in the admin panel of your website and create a new directory called feeds
- Go to Products > Export and click into your Google Shopping Feed export template
- Type in feeds/google-feed.txt into the Optional File Name field and save
- Click on the Export icon
- The export file will have been created and added to the feeds folder in the File Manager
Important:
Retail and Business Package Users - Every time you make changes to your products you must repeat step 4 just before the time you set to schedule the upload to make sure a fresh file is available for Google to pick up and import. If you don't do this Google will continue to import the original file you exported and this will be out of date.
Enterprise Package Users - You are able to setup a Scheduled Job for the Google Shopping Feed export at a frequency or time stated. See section 'Creating a Scheduled Job' below.
The feed set up in Google
- In the Google Merchant Centre dashboard click on Data Feeds
- Click on New Data Feed and select your target country
- Set the Content Language
- Type in the Feed Name (this is just a reference so you know which feed it is)
- Leave all other options as they are
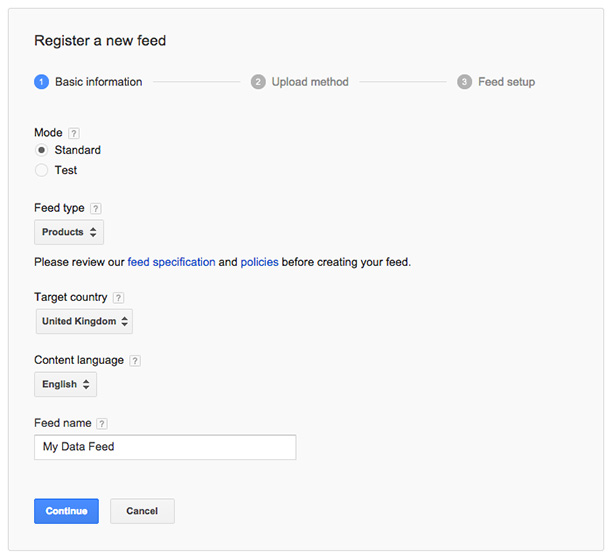
- Click on Continue
- Select Automatic upload (scheduled fetch) on the next page to tell Google to fetch the feed from your site
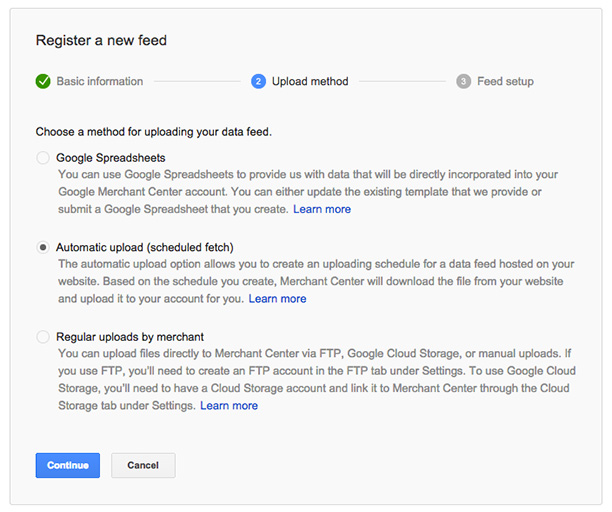
- Click on Continue
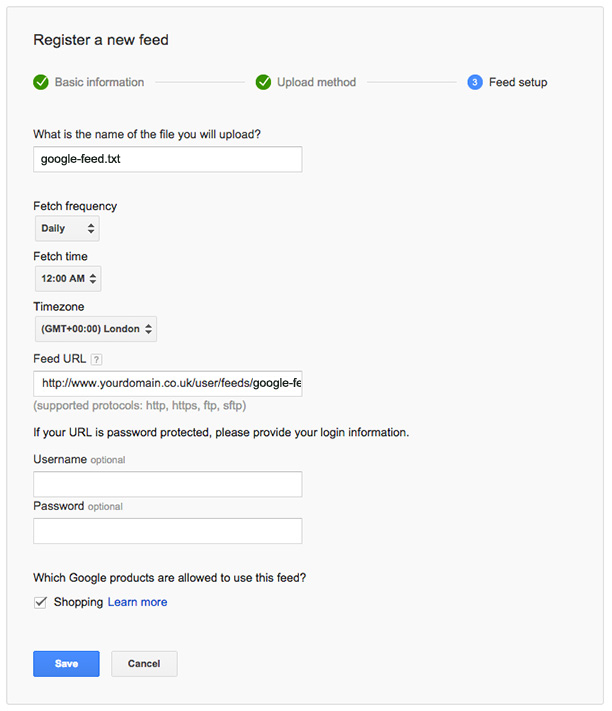
- Add in the name of the file you will upload. This must be exactly as you have saved it in step 4 of the feed set up in your Bluepark website as described above (Example: data_feed.txt).
- Set the Fetch Frequency and Fetch Time so Google knows when to pick the file up and process it
- Set your Time Zone
- Add in the Feed URL – this is the location of where the file will be stored in the File Manager in the admin console of your website (Example: https://www.yourdomain.co.uk/user/feeds/google-feed.txt)
- Leave all other options as they are and Save
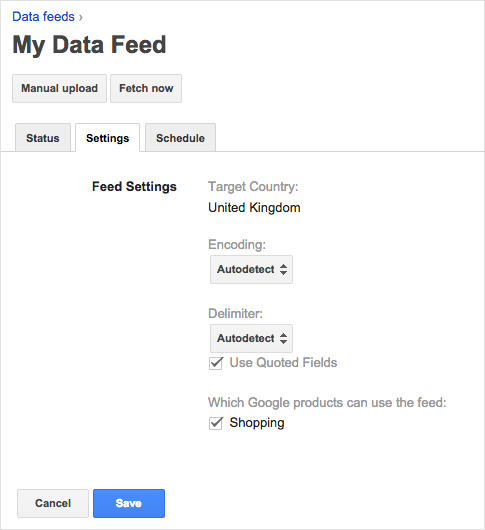
You will be taken back to the main Data Feed section but you need to make sure the settings for this feed are correct otherwise it won't work correctly.
Adjusting the Settings
- Click on the file name and then on the Settings tab
- Click on Edit button to be able to make changes
- Make sure Encoding and Delimiter are set to Autodetect
- Tick the Use Quoted Fields option (this is vitally important and the feed will produce errors if it is not ticked)
- Click on Save
Creating a Scheduled Job (Enterprise Package Only)
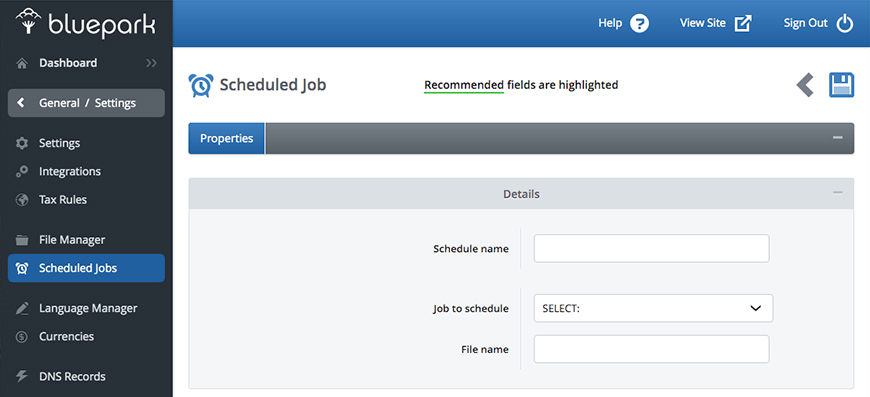
- In the admin console of your website go to General / Settings > Schedule Jobs and click on the Create New icon
- Give your schedule a name
- Select the Google Shopping Feed export you have created from the Job to Schedule drop-down
- Type in the file name you have set as you feed name in step 3 of Setting up your feeds in Google
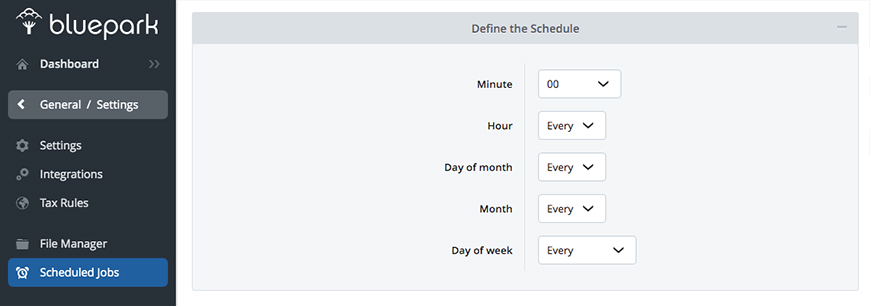
- Set the frequency and times you want the system to create your Google Shopping Feed file and Save
Recommended Reads
