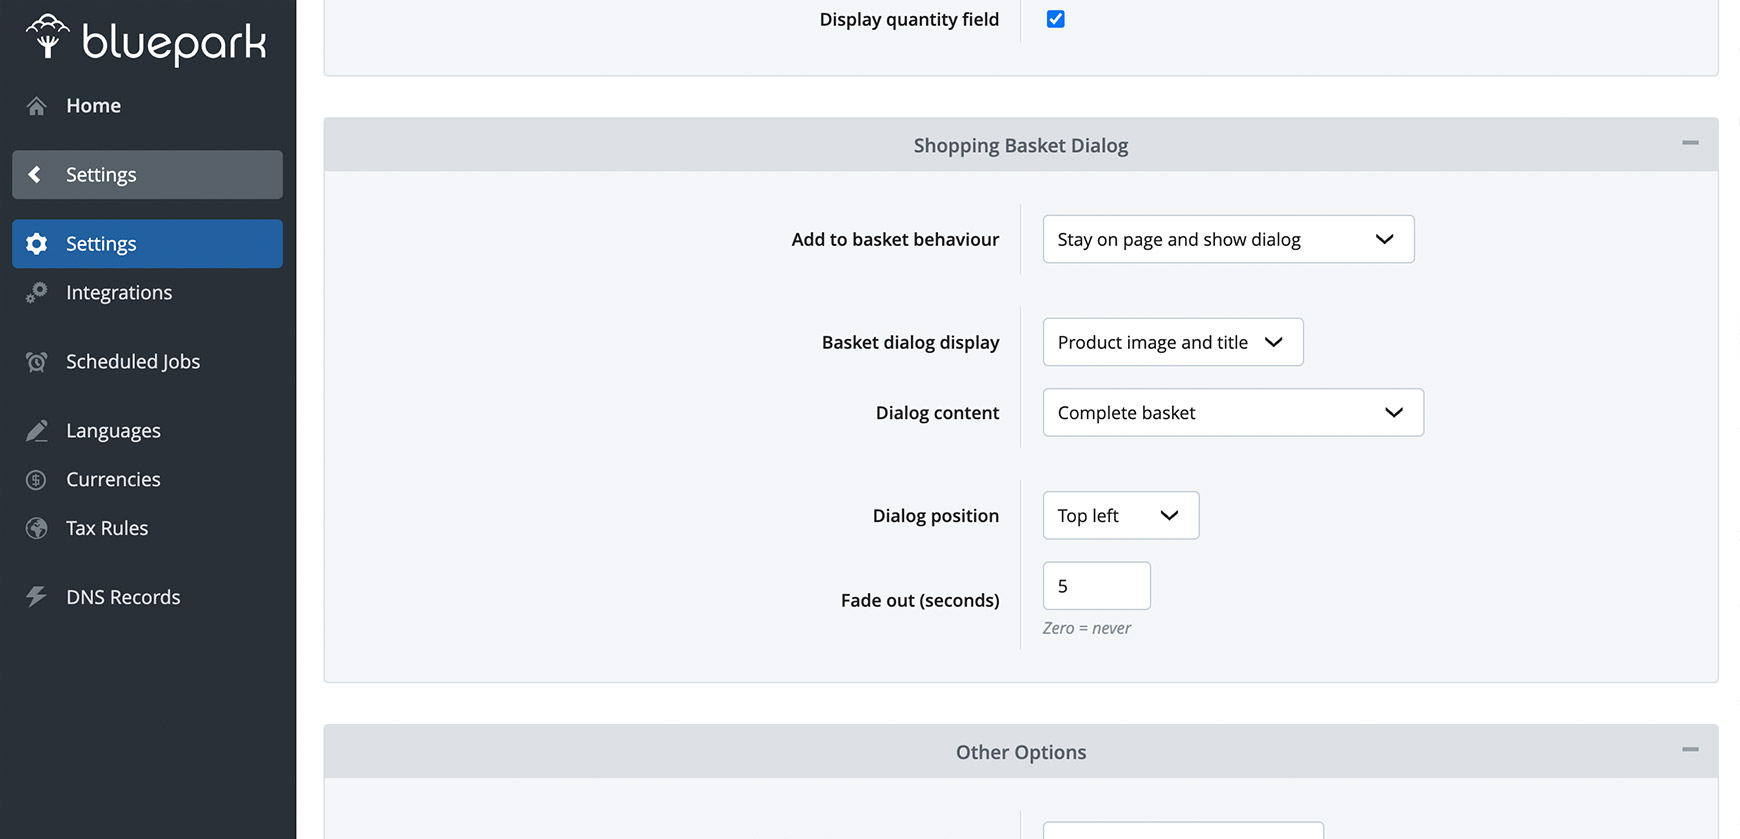
 Bluepark's V2 themes have a variety of new features for your basket and checkout and knowing the best way to use these on your site will help improve your customer's experience, leading to less people abandoning their basket. Our guide below explains how to set up your basket and checkout for ecommerce best practices easily with all the tools you need built in. The add to basket pop-upIt is best practice to display the Add to Basket dialog pop-up on your site for when visitors add products to their basket. This provides them with an obvious visual indication that the product has actually been added and allows them to keep track of what they have in their basket as they progress through the site. The popup can be added by going to Settings > Settings > Products tab > Shopping Basket Dialog section and setting Add to Basket Behaviour to Stay on Page and Show Dialog.
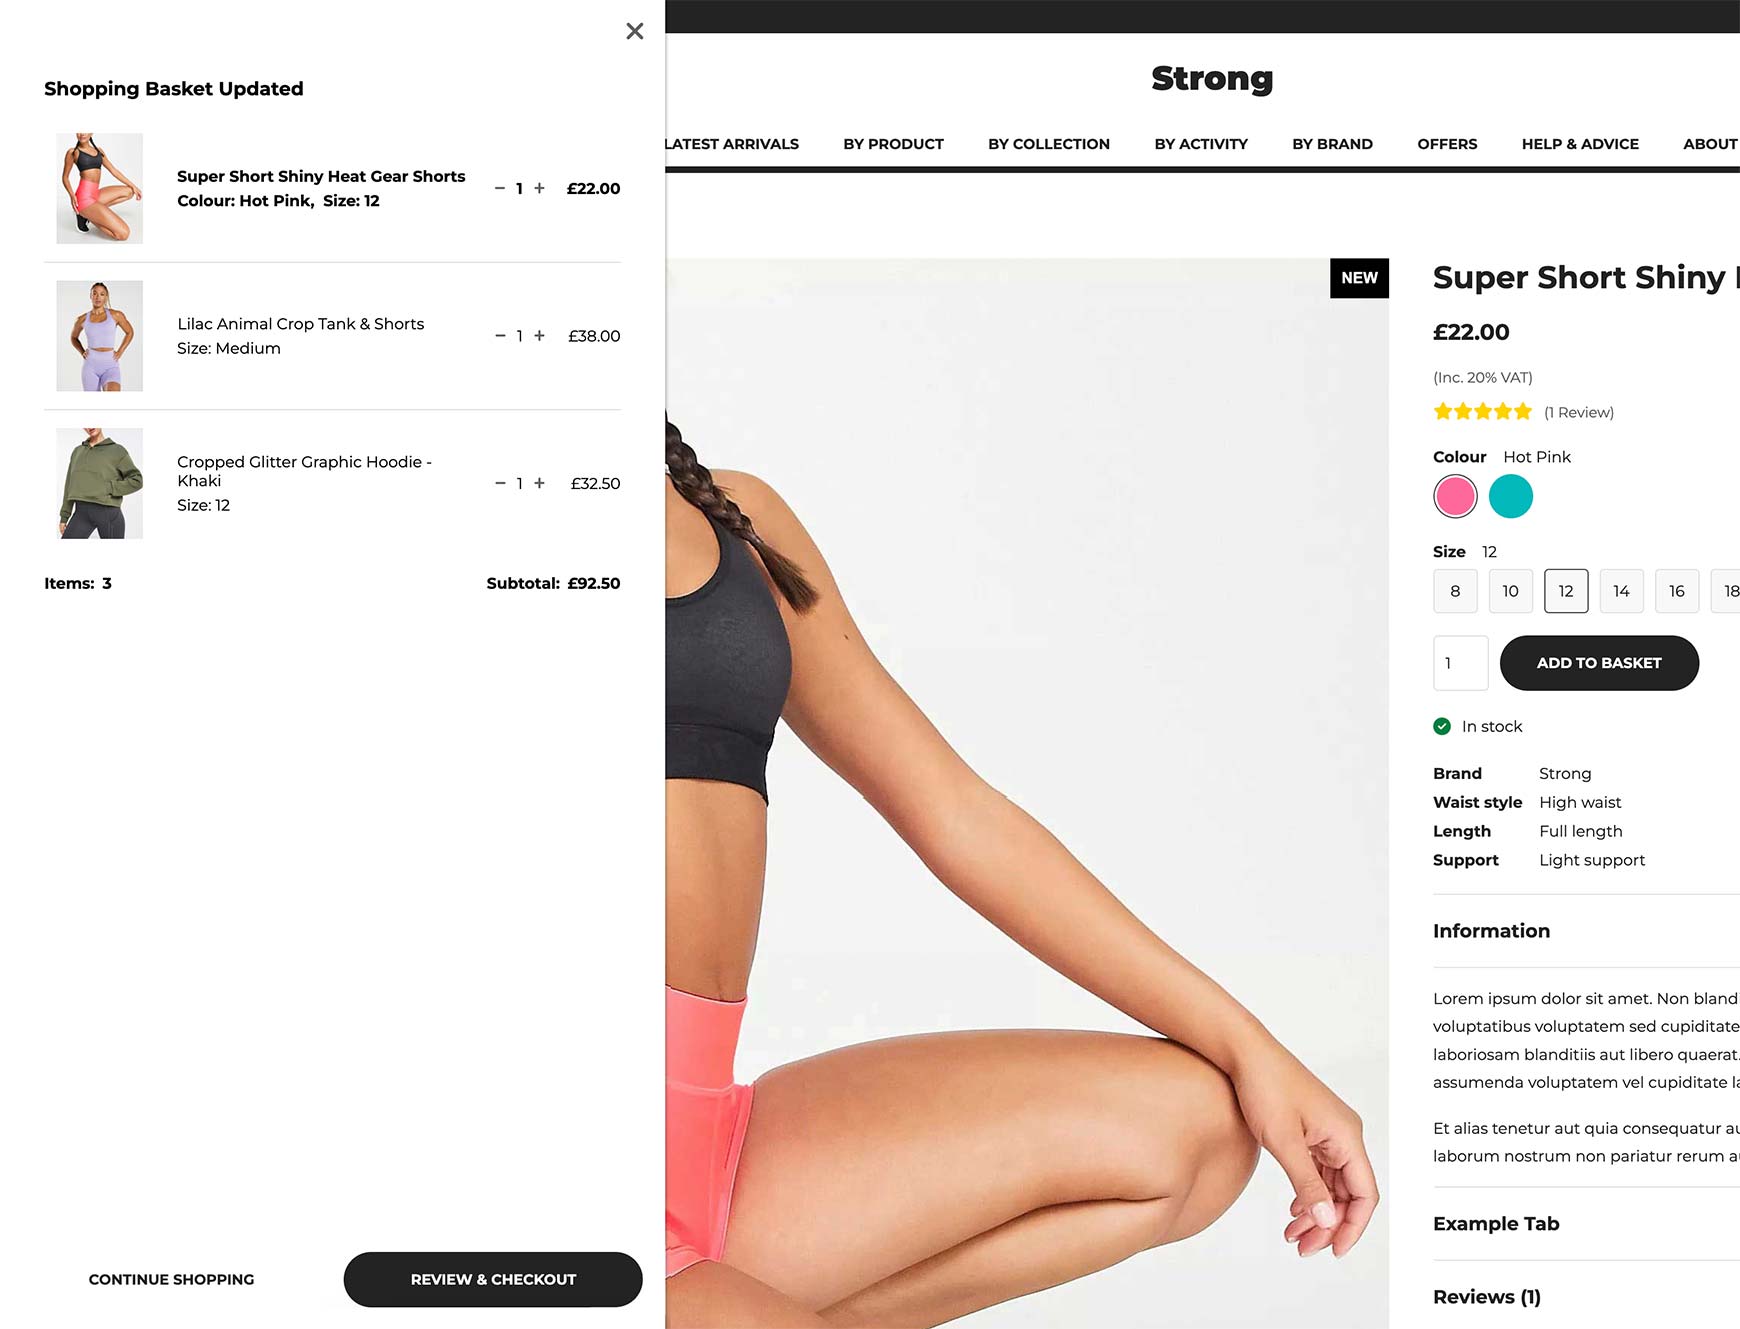
It is then recommended that Basket Dialog Display is set to Product Image and Title and Dialog Content is set to Complete Basket. Again, this ensures the visitor can clearly see what is in their basket as they add products. If you're using a V2 theme, you can now change how the add to basket pop-up displays. In the same section, Dialog Position determines where the pop-up is positioned in relation to the page. If you choose Top Left, the dialog now slides in from the left and displays the full height of the page. This is the recommended setting because, along with settings above, it allows you to show visitors everything they've added to the basket all at once.
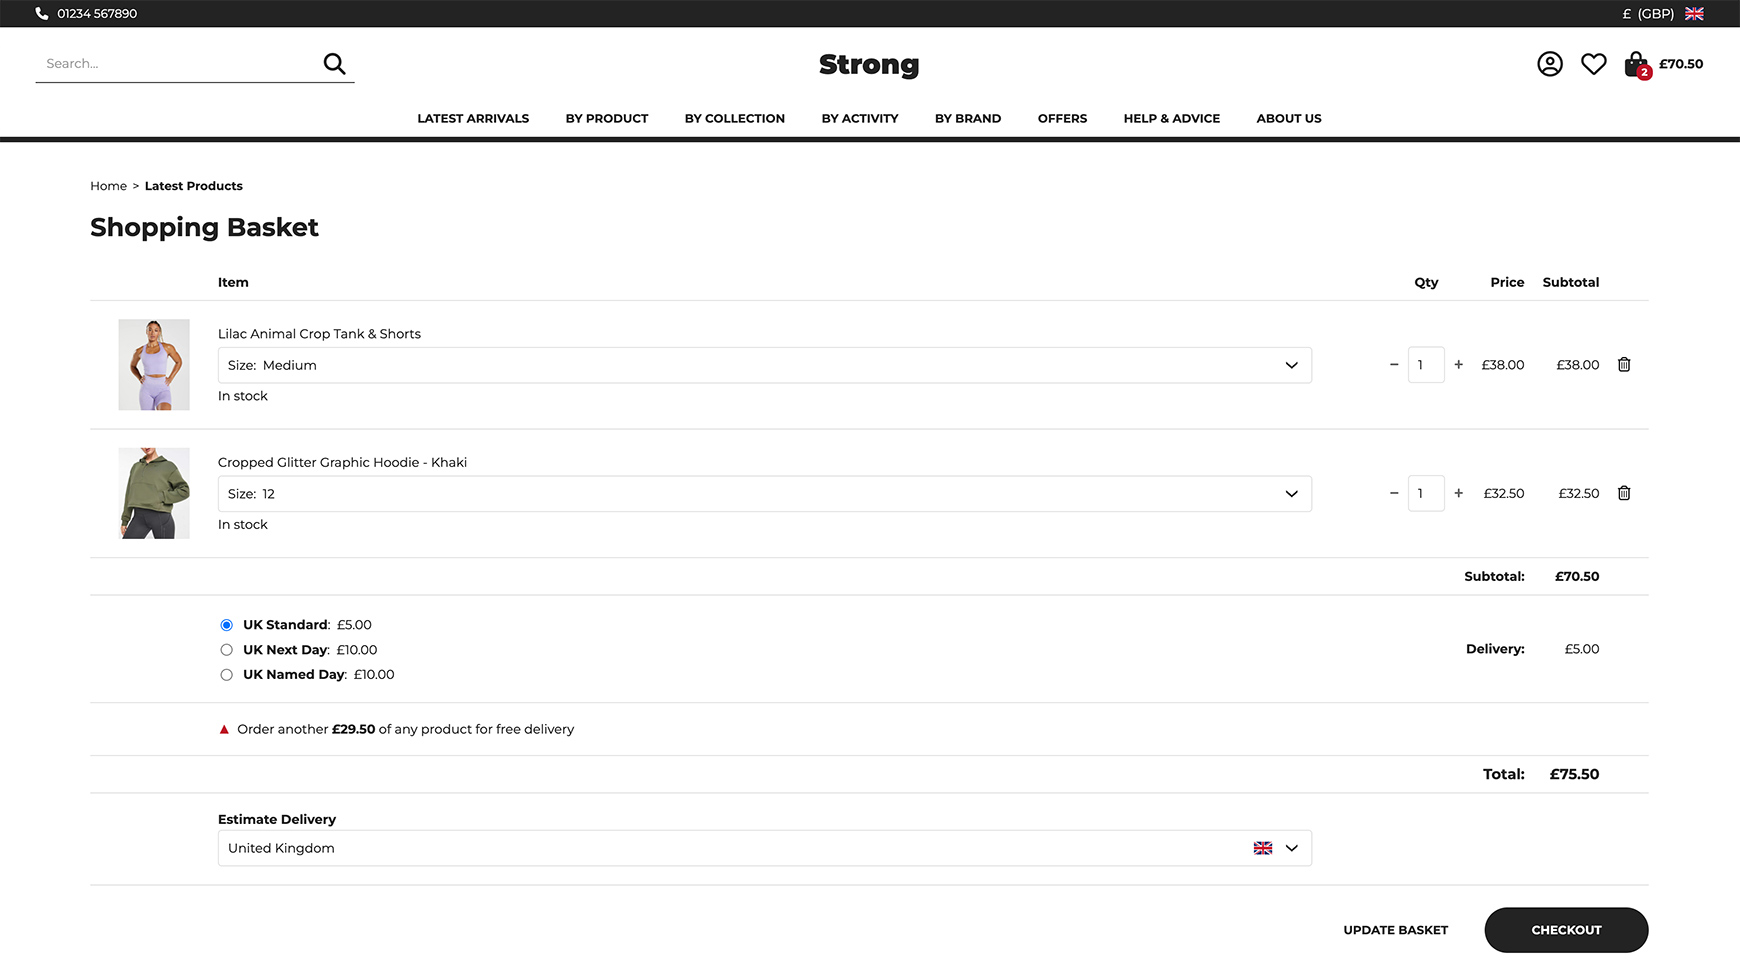
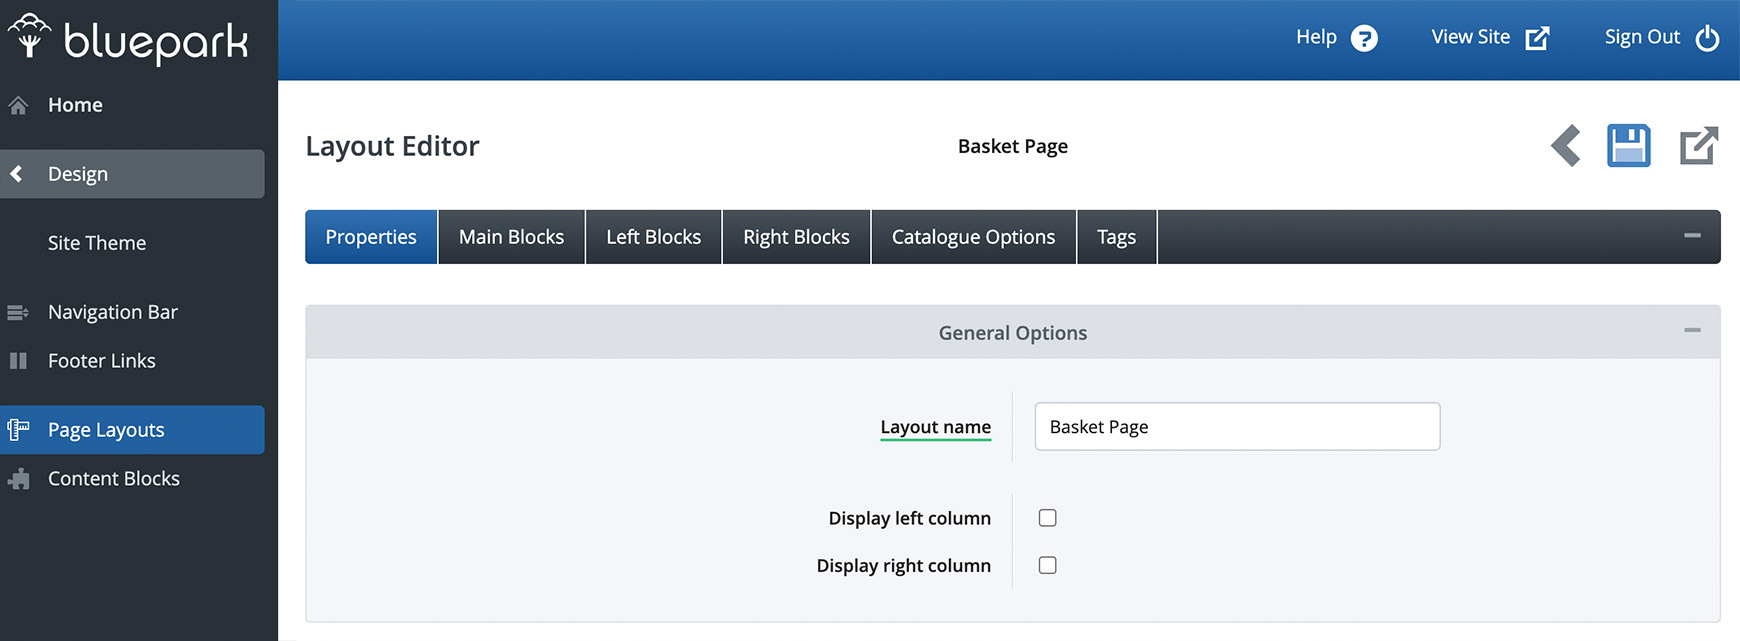
Please note: some of our themes slide the add to basket pop-up in from the right, when this option is selected, to match other functions within the theme. The basket page layoutIt is best practice to only have the Main Column appear on the shopping basket page, so we recommend switching off the Left and Right Columns on your Basket Page layout. This is because the ultimate goal of this page is to get the visitor to click on the Checkout button, which should be the most noticeable element on the page. Therefore, the basket page should be as uncluttered as possible to ensure they don't get distracted and end up clicking away from the page.
To do this, simply go to Design > Page Layouts and click to edit Basket Page. Then, untick Display Left Column and Display Right Column and save.
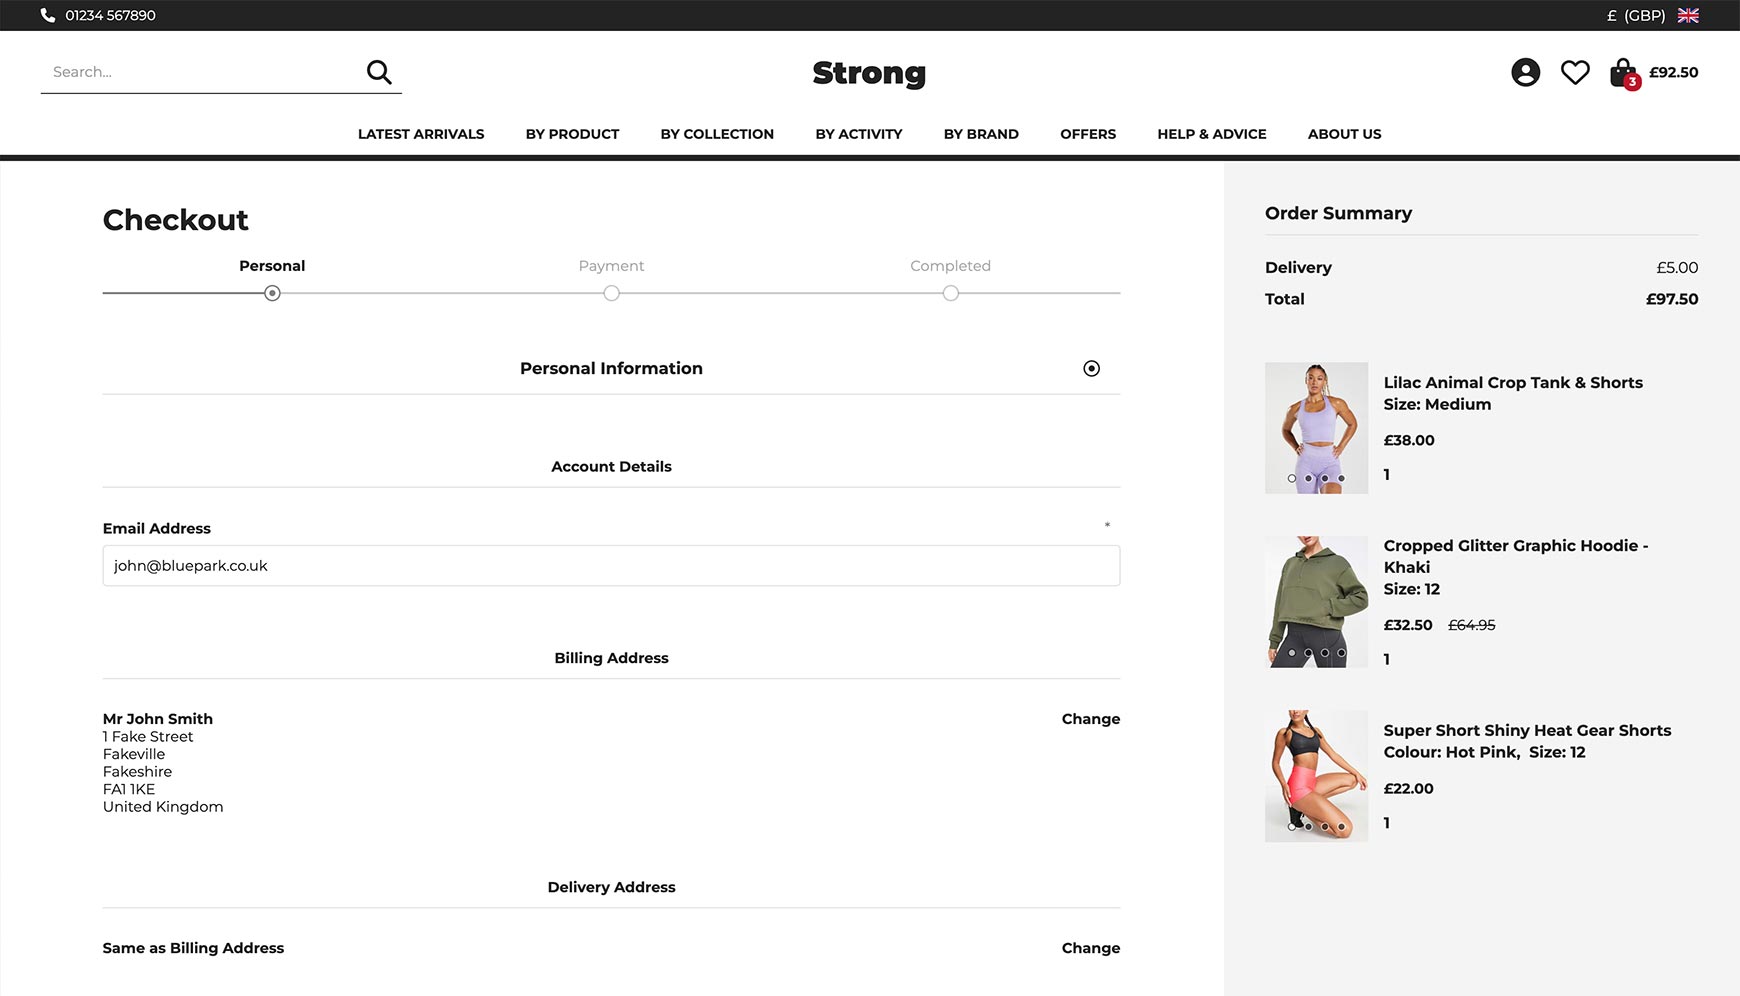
Lastly, ensure you have the Shipping Estimator is displayed within the Basket. This is because it is estimated that 17% of visitors abandon their basket if they can't find shipping costs before checking out. You can check your Shipping Estimator setup by going to Settings > Settings > Ecommerce Options tab > Shipping Options tab. Manual Selection, Show Methods is the recommended option for this. The checkout page layoutThe checkout now has two new blocks that we recommend using to ensure your customers keep track of what they're purchasing throughout. These are the Order Summary block and the Shopping Basket block. To add these to your Checkout, go to Design > Page Layouts and click on Checkout Page. In the Properties tab, tick Display Right Column and save. Click on the Right Blocks tab and set both Order Summary and Shopping Basket to active, making sure they are listed in that order. Next, click on the Shopping Basket block to edit it, untick Show Title Bar in the Properties tab and save. Please note: if you don't see these blocks available within the Right Blocks tab, check the Left Blocks tab. If they are set to Active (Green Flag) in this tab, set them to Inactive and then they will become available within the Right Blocks tab.
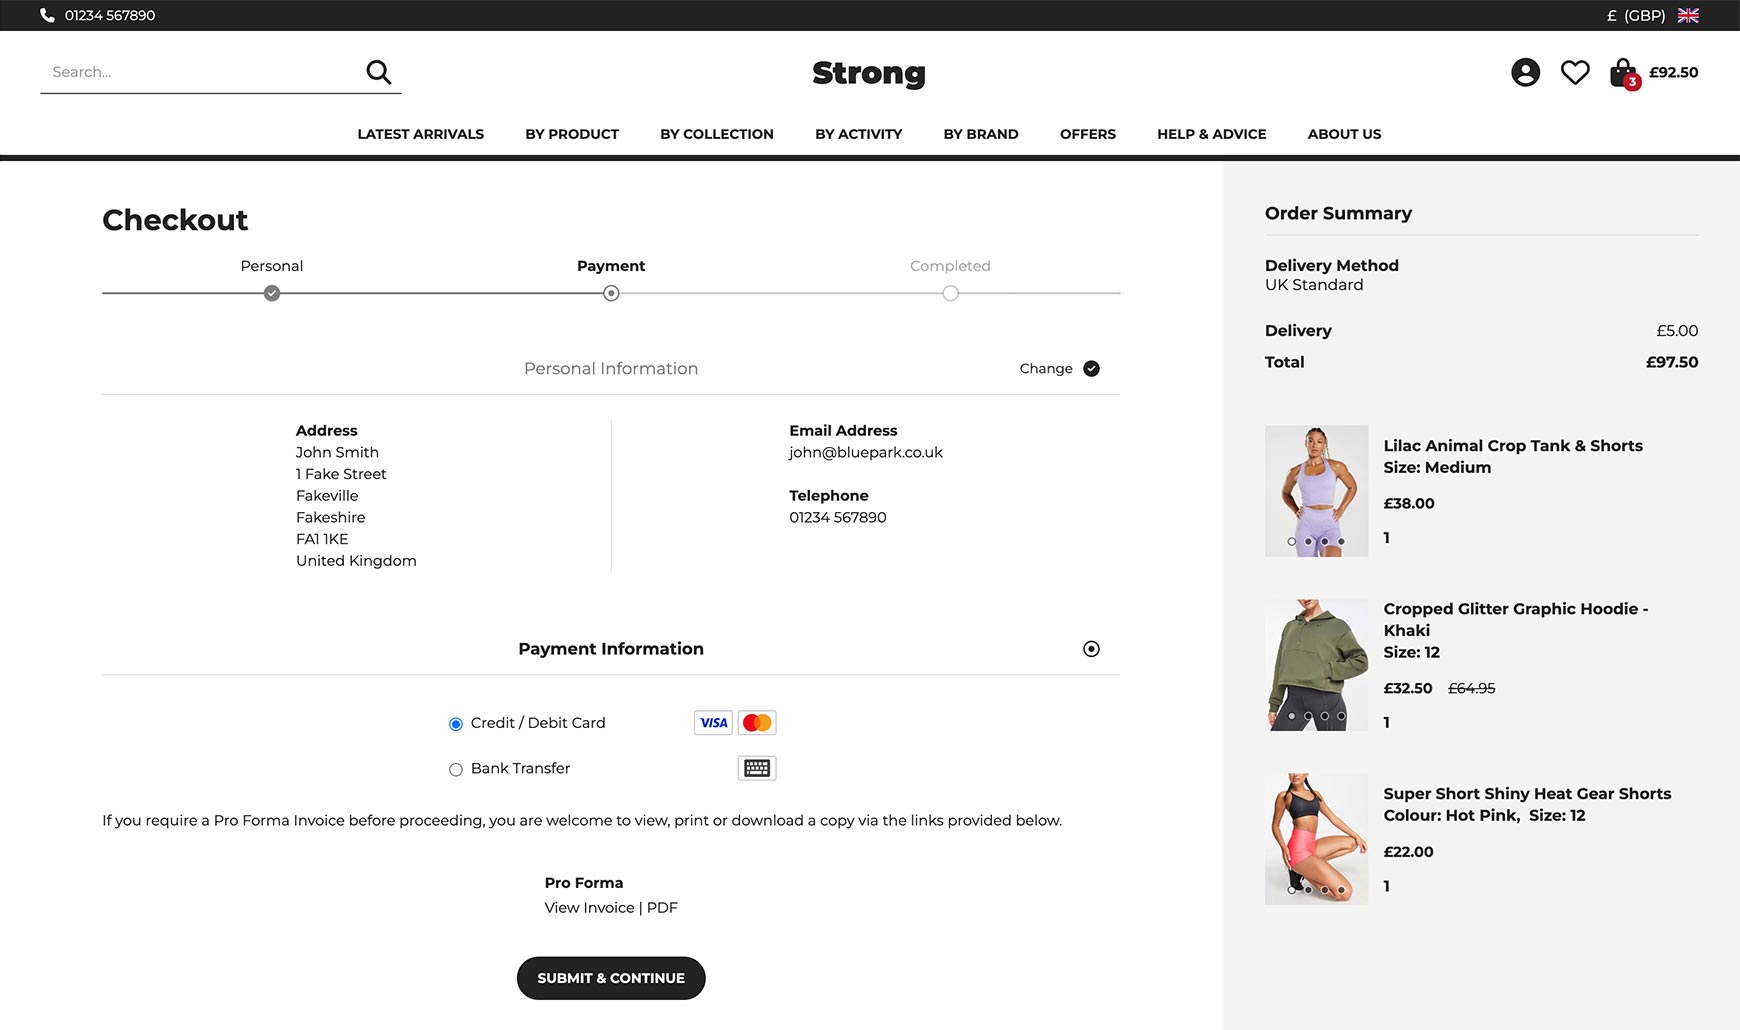
Please note: The above image shows the Strong theme styling of the One Page Checkout. Across our other themes, the layout of the product items on the right column can be different. Order Summary provides information to the customer as they progress through, such as the delivery costs, any discounts, and further details, such as loyalty points and gift vouchers that have been used. Once the customer has completed their order, the Order Summary block can display the customer's addresses to provide confirmation of where their order is being delivered to. You can choose which details you wish to display within the Settings tab of the block. Shopping Basket simply displays the products within their order. Within the Settings tab of the block, the Columns will always default to 1 for this block when it's displayed in the right column, purely because there is limited space for the products to fit into. However, you can set this block to a Carousel, if you wish, although it is not our recommended setting.
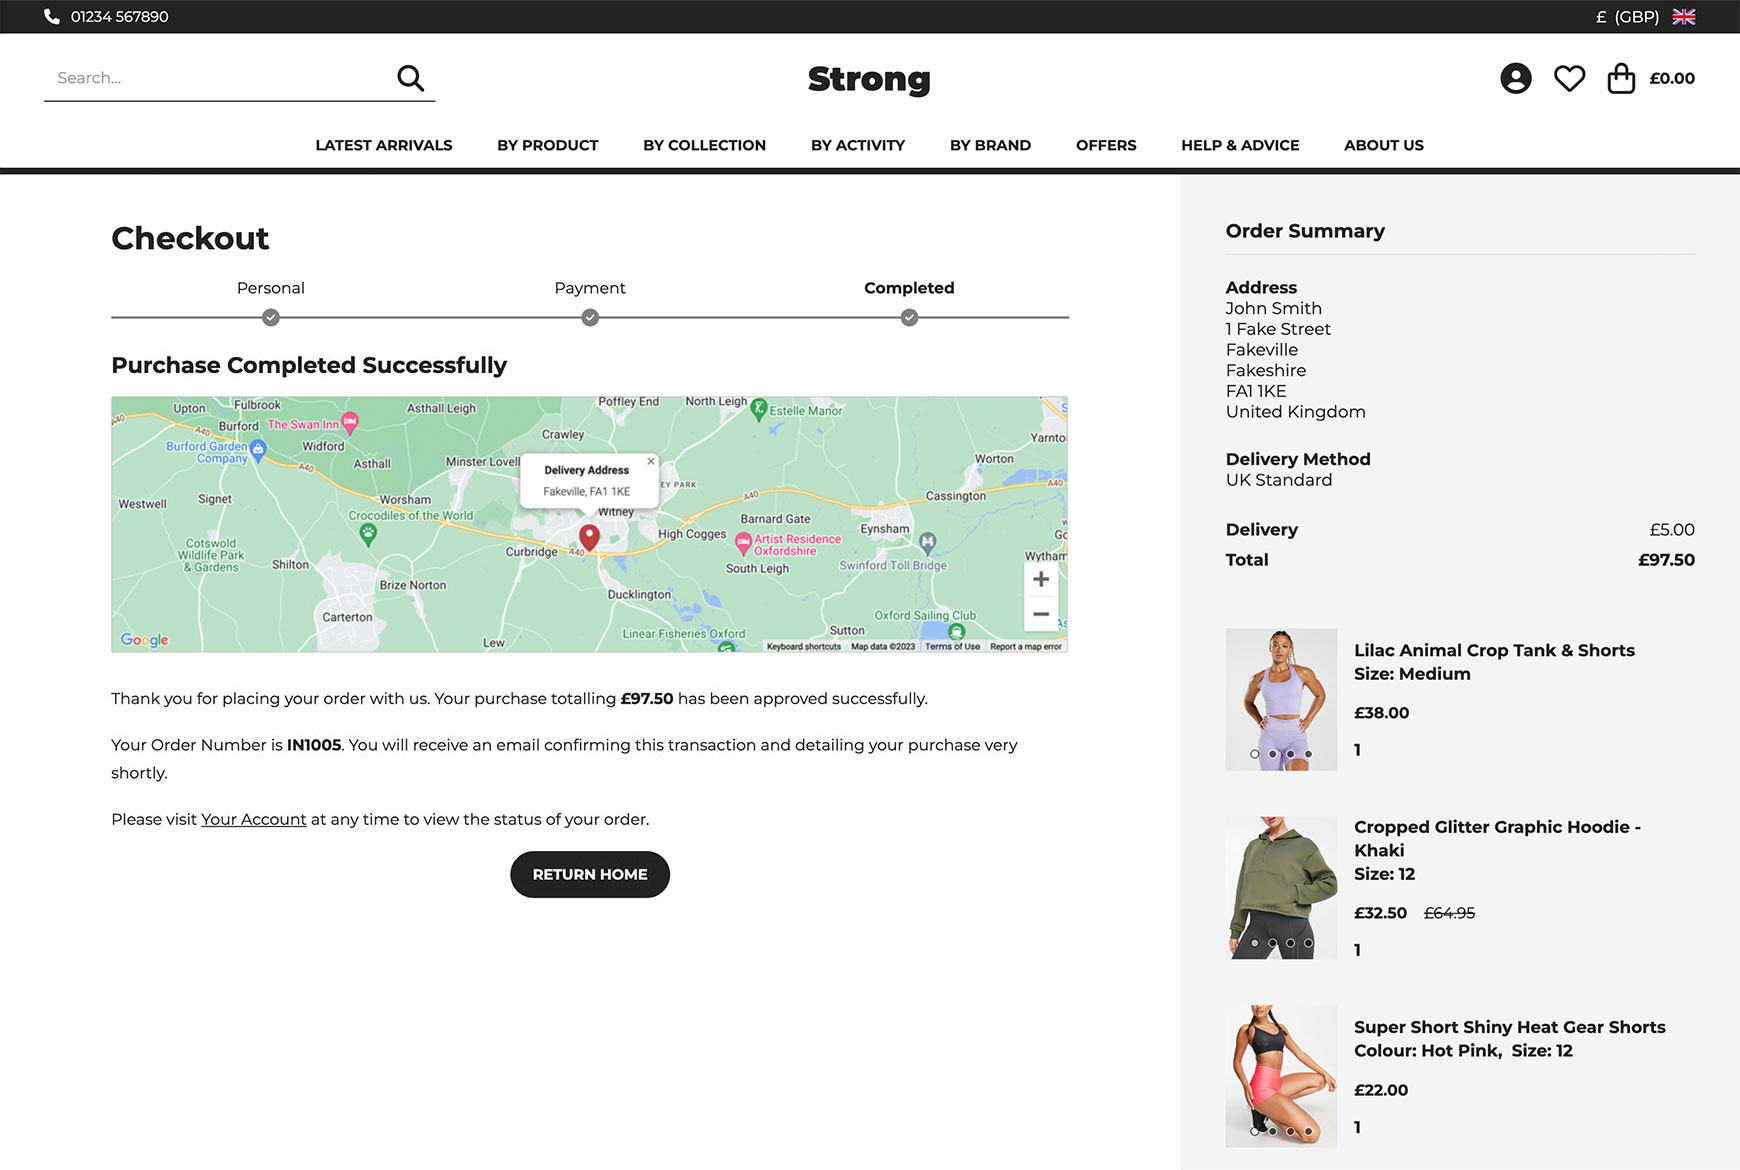
Google MapsThe V2 checkout now has the ability to display a map of where the customer's order is to be delivered to on the Checkout Success page. This gives a visual indication to the customer of the delivery address they've added and makes it very obvious if they've made a mistake in what they've entered. They can then alert you to this straight away, which removes costly issues later on once the order has been shipped. To automatically display the map at the final stage of checkout, you will need to connect with Google Maps.
Checkout Success page layoutIf you've been with Bluepark for a while, you may have a separate Checkout Success Page layout. This is no longer needed, unless you have bespoke content blocks assigned to layout that aren't assign to the Checkout Page layout. Therefore, we recommend deleting the Checkout Success Page layout and then going to Settings > Settings > Display Options tab > Theme and Layout for Checkout Pages section and setting Checkout Success Layout to Checkout Page. One-Page CheckoutIf your site is set with a V2 theme as default, you can now use our brand new One-Page Checkout. This keeps the customer on the same page throughout the checkout process, allowing them to add their addresses(es), fill in any additional form added, choose their date of delivery if named day delivery is selected, and add their payment details without leaving the page.
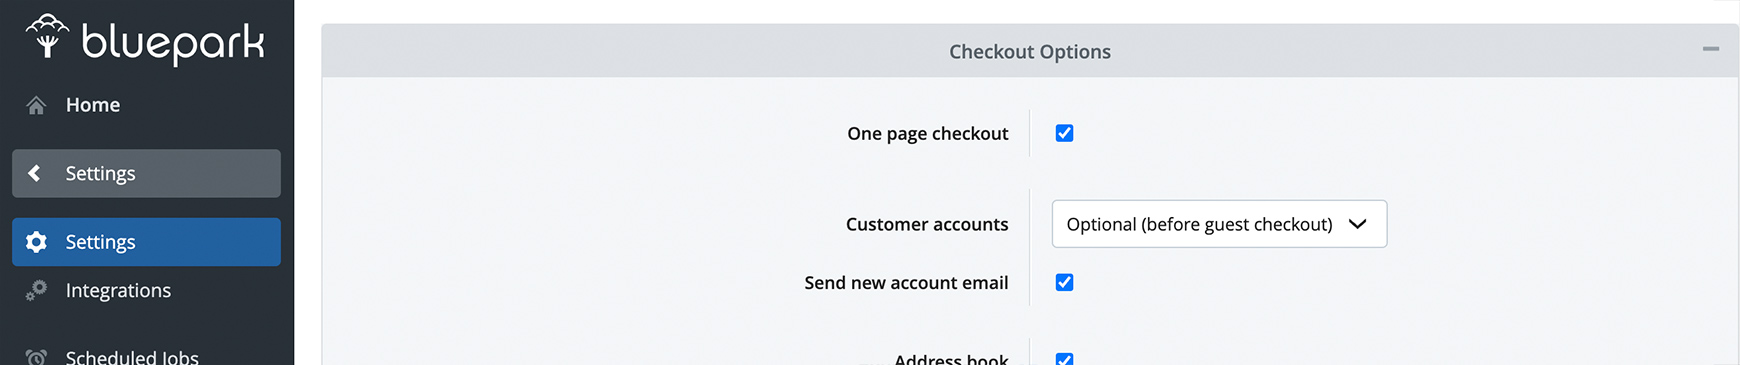
To switch on One-Page Checkout, go to Settings > Settings > Orders tab > Checkout Options, tick One-Page Checkout, and save. It's that simple!
However, although we have tested this new feature extensively, we highly recommend testing the new checkout on your site to ensure there are no issues. As there are so many variables when it comes to the checkout, such as additional forms, different customer detail options, multiple payment providers, we simply can't test every scenario. If you have any issues, untick One-Page Checkout and report them to us immediately. Please note, if you are still using a V1 theme on your site, you will need to upgrade to a V2 theme in order to use One-Page Checkout and the associated blocks. We recommend watching our Introducing Bluepark V2 Themes video and having a read of our Introducing Bluepark V2 Themes guide before you start. Recommended reads How to change the default text on my site Change the default text on your site to create a unique and engaging user experience for your customers. Try Bluepark for FREE for 14 daysFull access to everything including our support team, no card details required |
|

× Create your free trialGet started for FREE for 14 daysWe recommend building your online shop on a desktop device for the best possible experienceAlready have a free trial? Sign In Now |
|