Product Tabs allow you to make your product pages less cluttered as each tab can contain its own unique piece of text, images or form. This can help to make your pages become clean, easy to read and much more inviting, which, of course, leads to better conversion rates. Tabs can easily be assigned to the product pages on your Bluepark site by following our guide below. Create your product tabsNext you need to create the tabs you want to appear on the product pages. Go to Products > Product Tabs and click on the green Create New icon to create your first tab. 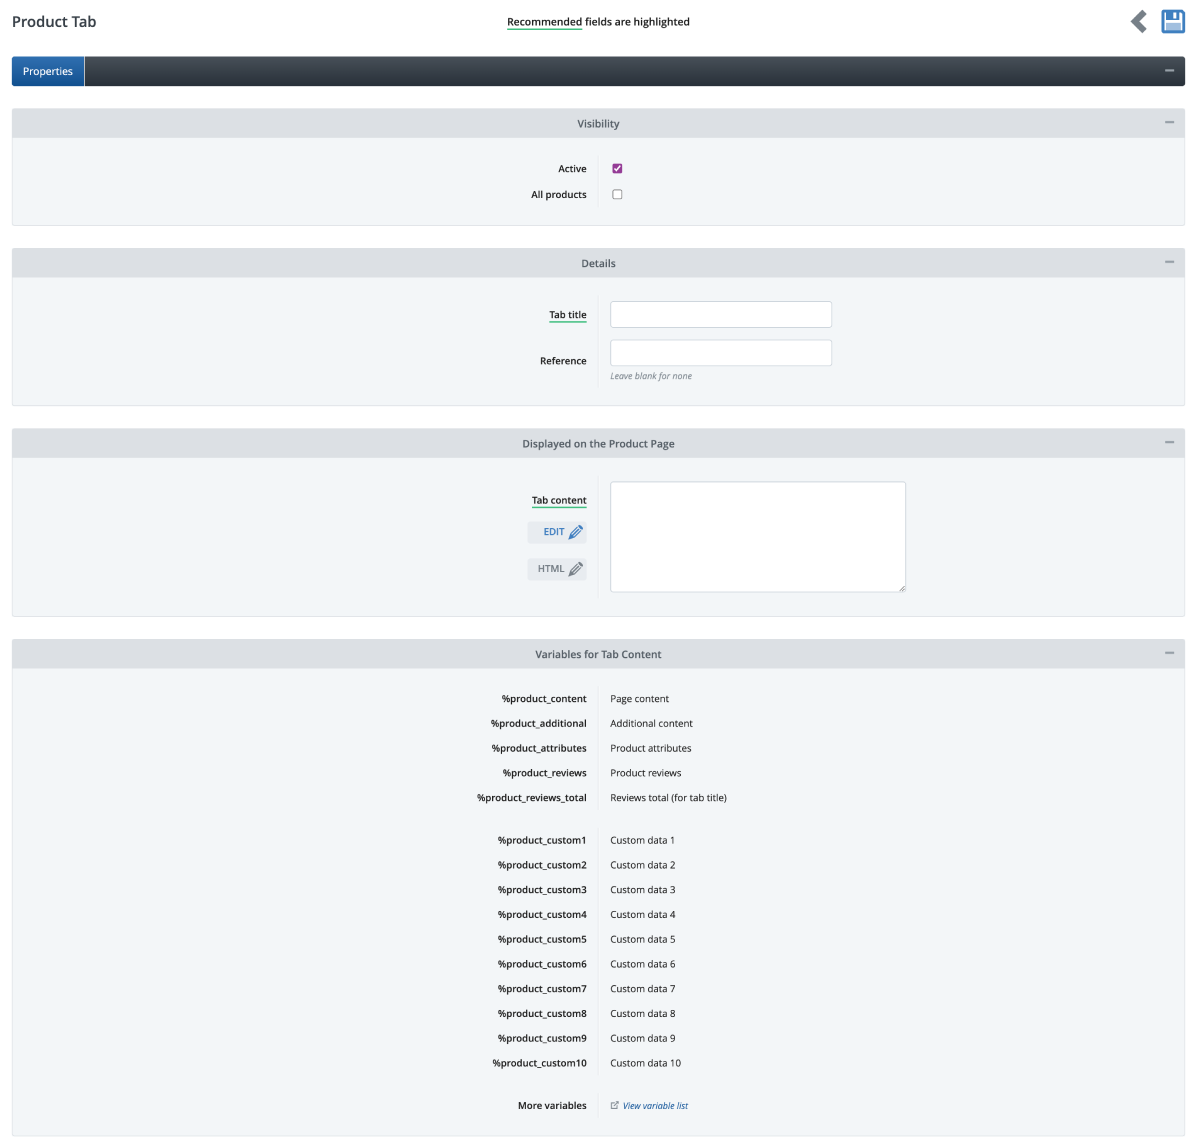 The name of the tab is set within the Tab Title field which is what will appear within the tab header on the website. The Reference field can then be used as an internal reference if you plan to create more than one tab with the same name. The Tab content field is the actual content of the tab and this will appear on any product you add this tab to. If you wanted to display the same content on every product, you would type it directly into the Body field. For instance, it could be text which contains delivery or returns information. Alternatively, if you want to have a tab with different information on each product, i.e. ingredients or care instructions, you can use variables (small pieces of code that automatically pull through pieces of Product information) to populate the content of the tab with dynamic content. For instance, adding the variable %product_content will populate the tab with text from the Page Content field of each product within the Product Editor. This would be set up as follows: Product tab set up
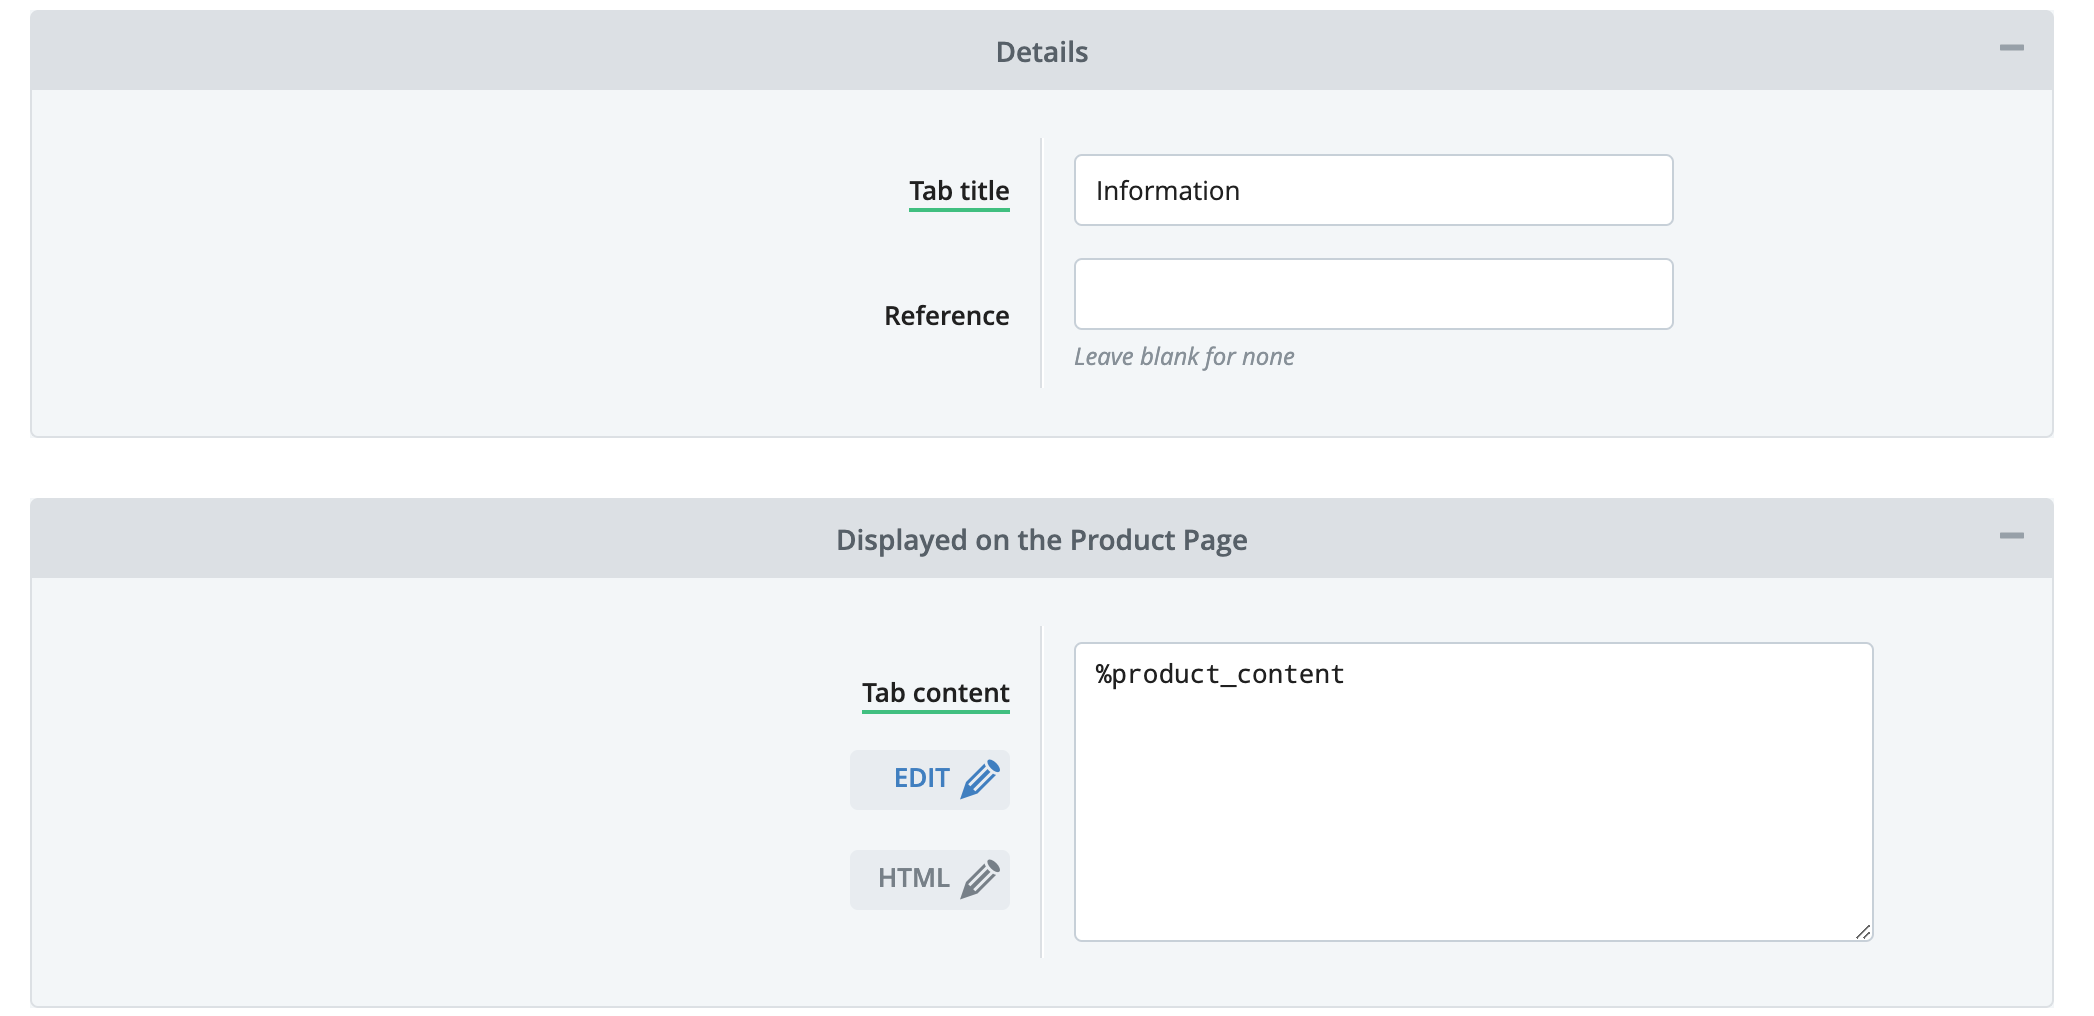
Product tab content in Product Editor
This will produce the following on the product page
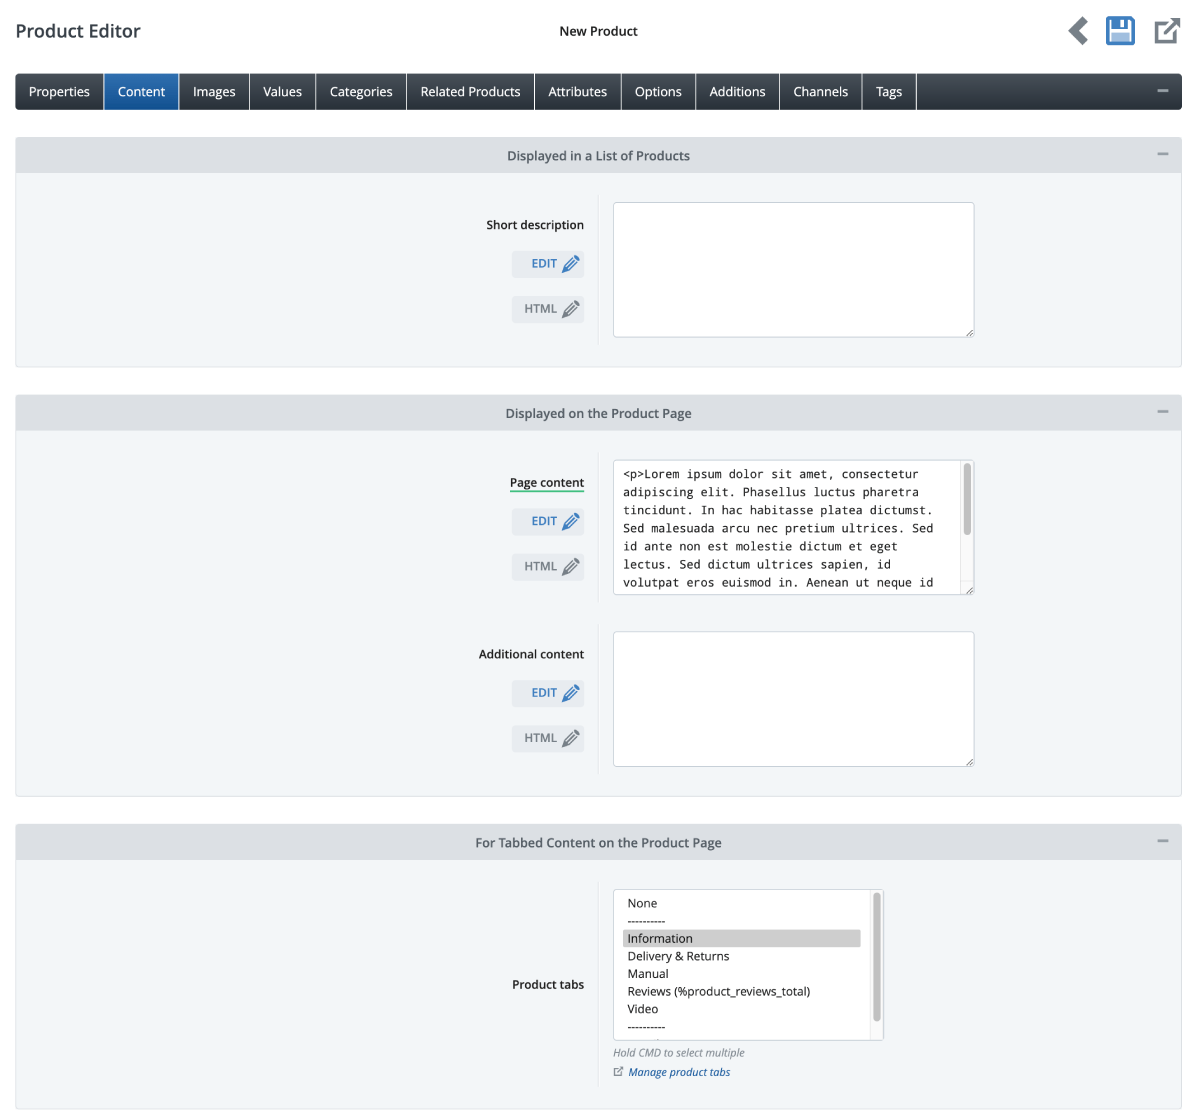
(Theme used: Divine) Other variables to useThe most common variables you could use are listed within the Variables for Tab Content section at the bottom of the Product Tabs and a full list can be viewed by clicking on the View Variable List link underneath. The Custom Data variables, such as %product_custom1, can be used to add in extra information into your product tabs and correspond to the Custom Data fields within the Channels tab in the Product Editor. Assigning the tabs to the product pageWithin the Product Manager go to the product you wish to add your tab to, then go to the Content tab and scroll down to the Product Tabs section. Click on the tabs you wish to appear on this product. To select more than one tab hold down the CTRL key on your keyboard and then click on the tab names. Each one will highlight when it has been selected. Alternatively, you can add the tabs in bulk by using the Import Product Data feature. This will save you a lot of time when adding the same tabs to multiple products. Remember, if the field you have set as your tab variable is empty in the Product Editor the tab will appear blank on your product page. NB. If you have customised the Product Detail Page HTML you will need to make sure the Product Tabs variable is included in the HTML for the tabs to appear on the website. Try Bluepark for FREE for 14 daysFull access to everything including our support team, no card details required |
|


× Create your free trialGet started for FREE for 14 daysWe recommend building your online shop on a desktop device for the best possible experienceAlready have a free trial? Sign In Now |
|