When running a business that relies on stock from external suppliers it is fundamental that the purchasing and processing of stock is run smoothly and efficiently. Chopping and changing from one system to another to find out what stock is needed, creating a purchase order, sending it to suppliers and receiving stock back in can be time consuming. That's where Bluepark comes in, now you can do it all from one dedicated area in your website's admin console. Link stock to supplierThe first thing you'll need to do before creating your first purchase order is make sure all of your products are assigned to their relevant supplier. You can do this by following our helpful guide - How to set up suppliers and link your products. Configure your purchase order settingsIn the Company tab in Settings, you can create your own custom purchase order template with the Customise Purchase Orders section, just as you can with invoice and despatch notes. However, if you're not experienced with HTML and CSS, we highly recommend you leave this as the default setting.
In Settings > Orders tab you can set your Purchase Order Prefix and Purchase Order Offset, the same way you can with invoices and despatch notes. This will allow you to create your own unique purchase order numbers. In this tab, you can also set whether you want to include the SKU, barcode, part number, additions, comments, internal shipping reference, telephone number and email address on the purchase orders, again, exactly as you would do with invoices and despatch notes. You will also need to make sure that all products have their cost prices set against them, which you can do so within the Product Editor. Just make sure the Use Cost Prices option is switched on within Settings > Ecommerce Options tab. Create purchase order
In Orders > Purchase Orders, you will initially see a drop-down where you can search by Supplier, Email Address or Order Number. This allows you to search within your purchase orders once they have been created. To create a new purchase order, just click on the Create New
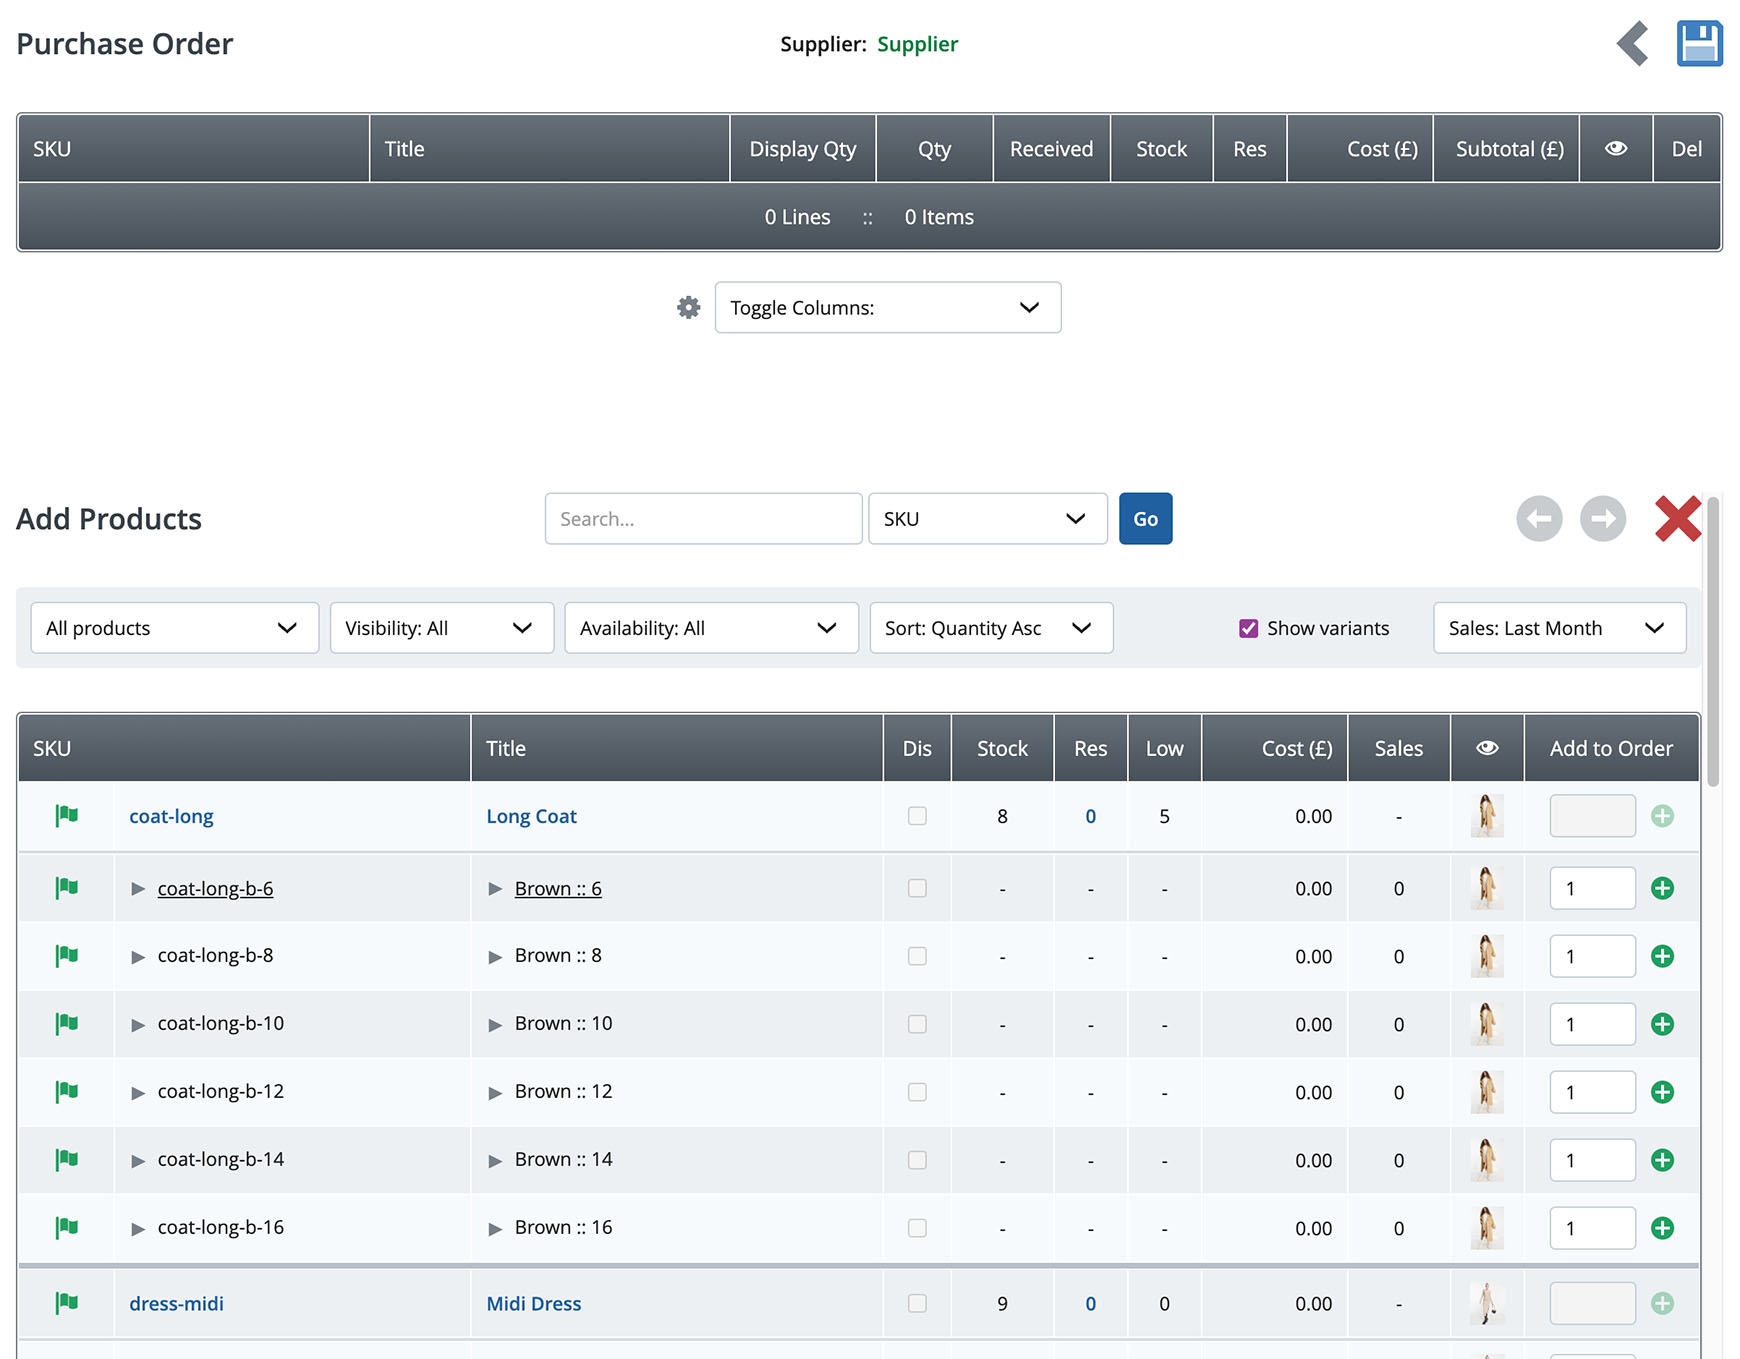
Click on the Find and Add Products button at the bottom and you will be presented with a slightly reduced down version of the Product Manager. By default it will be displayed with the lowest stock first. It will also show the number of sales of each product for the last 30 days. Where the field in the Add to Order column is greyed-out, this means that it is a parent product. To show the variants, and add them to the purchase order, tick the box next to Show Variants at the top right of the products list. To find the products easily, use the standard Product Manager filter drop-downs across the top, such as filtering by category, visibility, availability and etc. Alternatively, you can use the search box to find specific products by SKU, part number, bar code and etc.
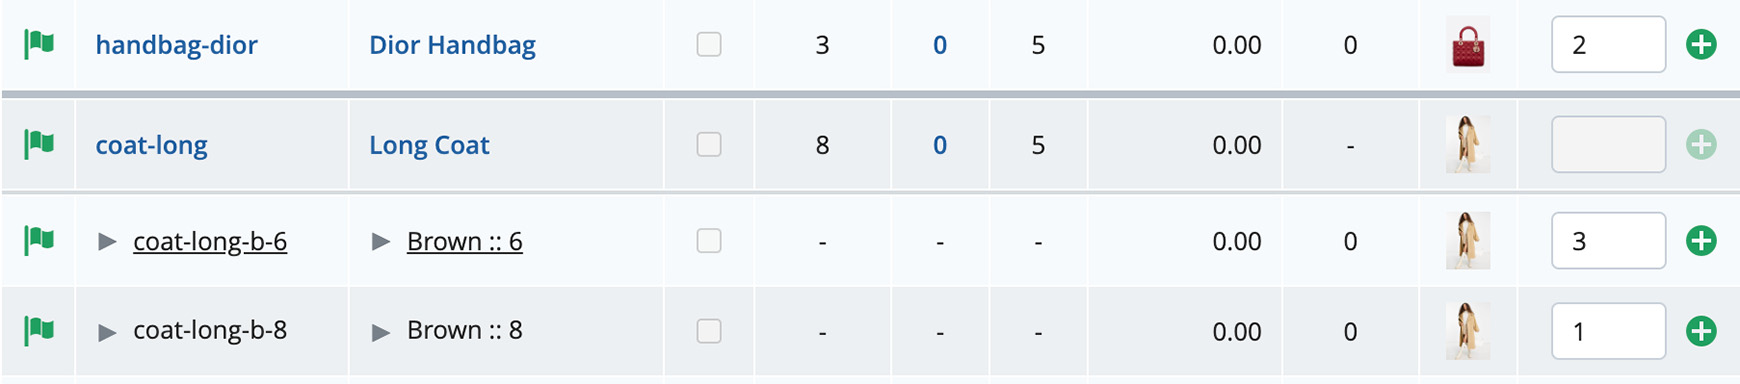
To the right of the products you wish to add to the purchase order, type in the number required into the Add to Order column and click the green plus icon next to it. These items will then be added to the purchase order. However, these will remain red flagged until the purchase order is completed. Once you've added all the required stock, click Save.
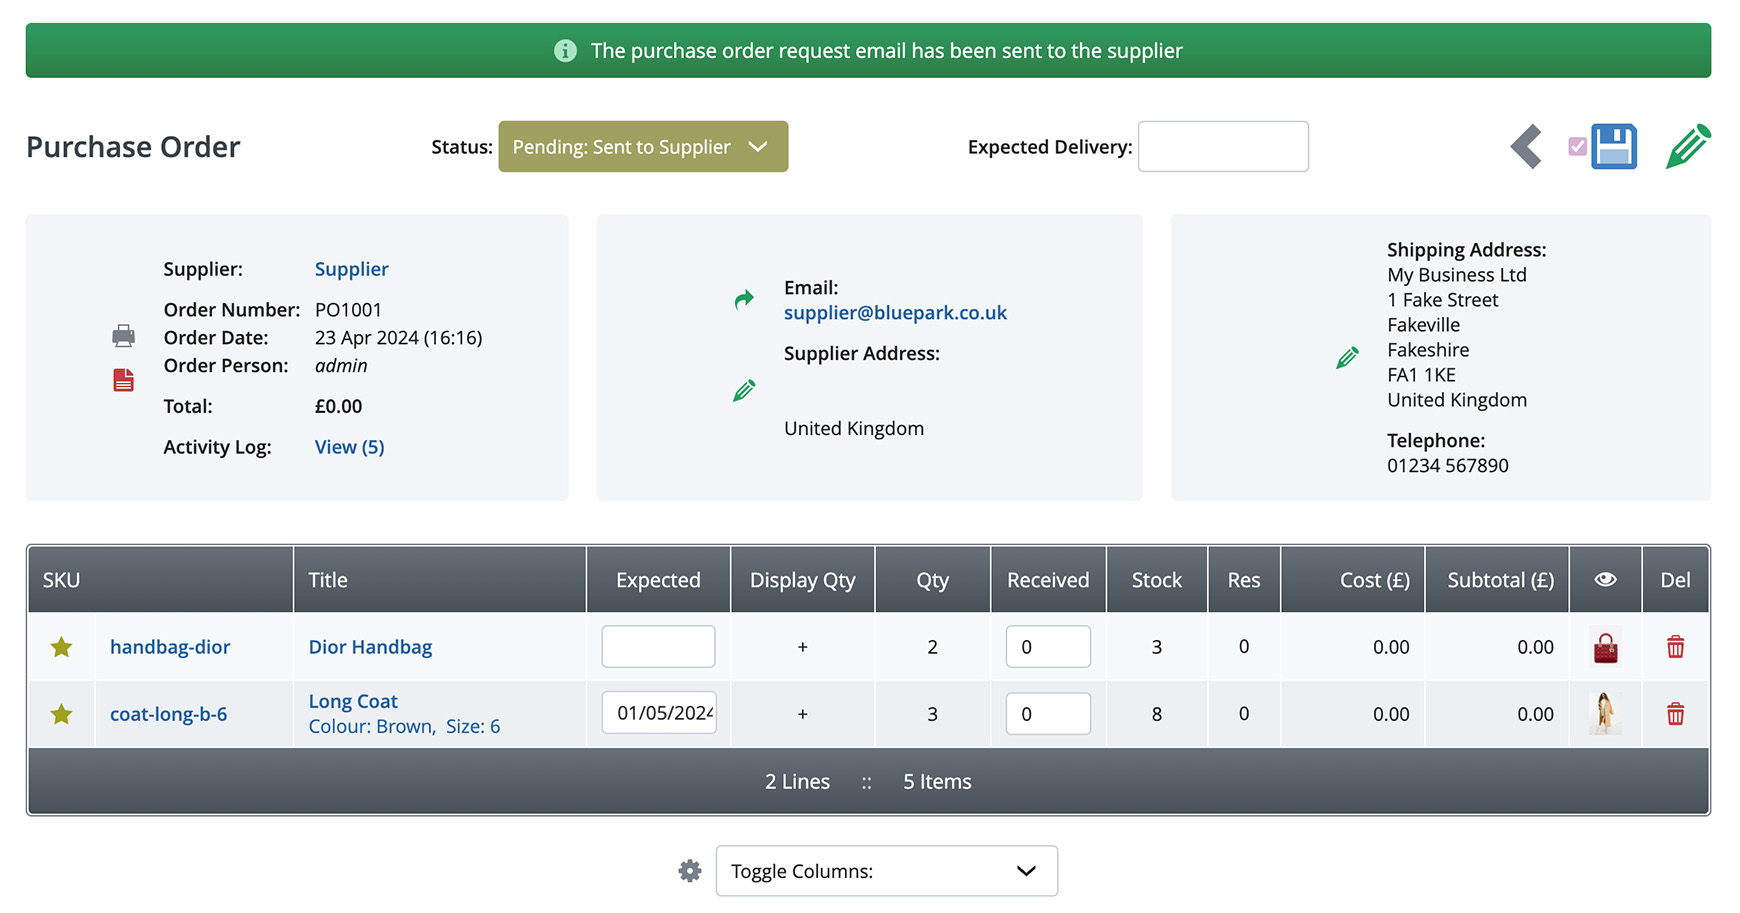
At this point the Status will still remain as Unfinished: Unsent. This allows you to continue editing the purchase order if you wish to. Just click on the quantity figure to change it. You can also add your own Reference and Comments to the purchase order before continuing by clicking the Edit Send purchase order to supplierIf you wish, you can now print the purchase order by clicking on the Print icon, so it can be sent via the post if that's what your supplier requires. However, as the majority of suppliers prefer this information by email, you can do this automatically once the purchase order is finished. All you need to do is select Pending: Send To Supplier in the Status drop-down and click on the Save icon. It is at this point that the email is sent. If you wish to set the purchase order to Pending, but don't want to send the email at the point, make sure you un-tick the box next to the Save icon before clicking on it. You can then click on the Re-send (green forward arrow) icon next to the supplier's email address to send the email later. Receive stock into online shop
If your supplier provides you with expected dates of when your ordered stock is coming in, you can automatically let your customers know of the date by adding it to the purchase order. This can be done either as an overall date for all of the ordered stock in the Expected Delivery field at the top of the page or on a product by product basis on each individual line within the Expected column. Your customers will then see this displayed in the availability message on the corresponding products.
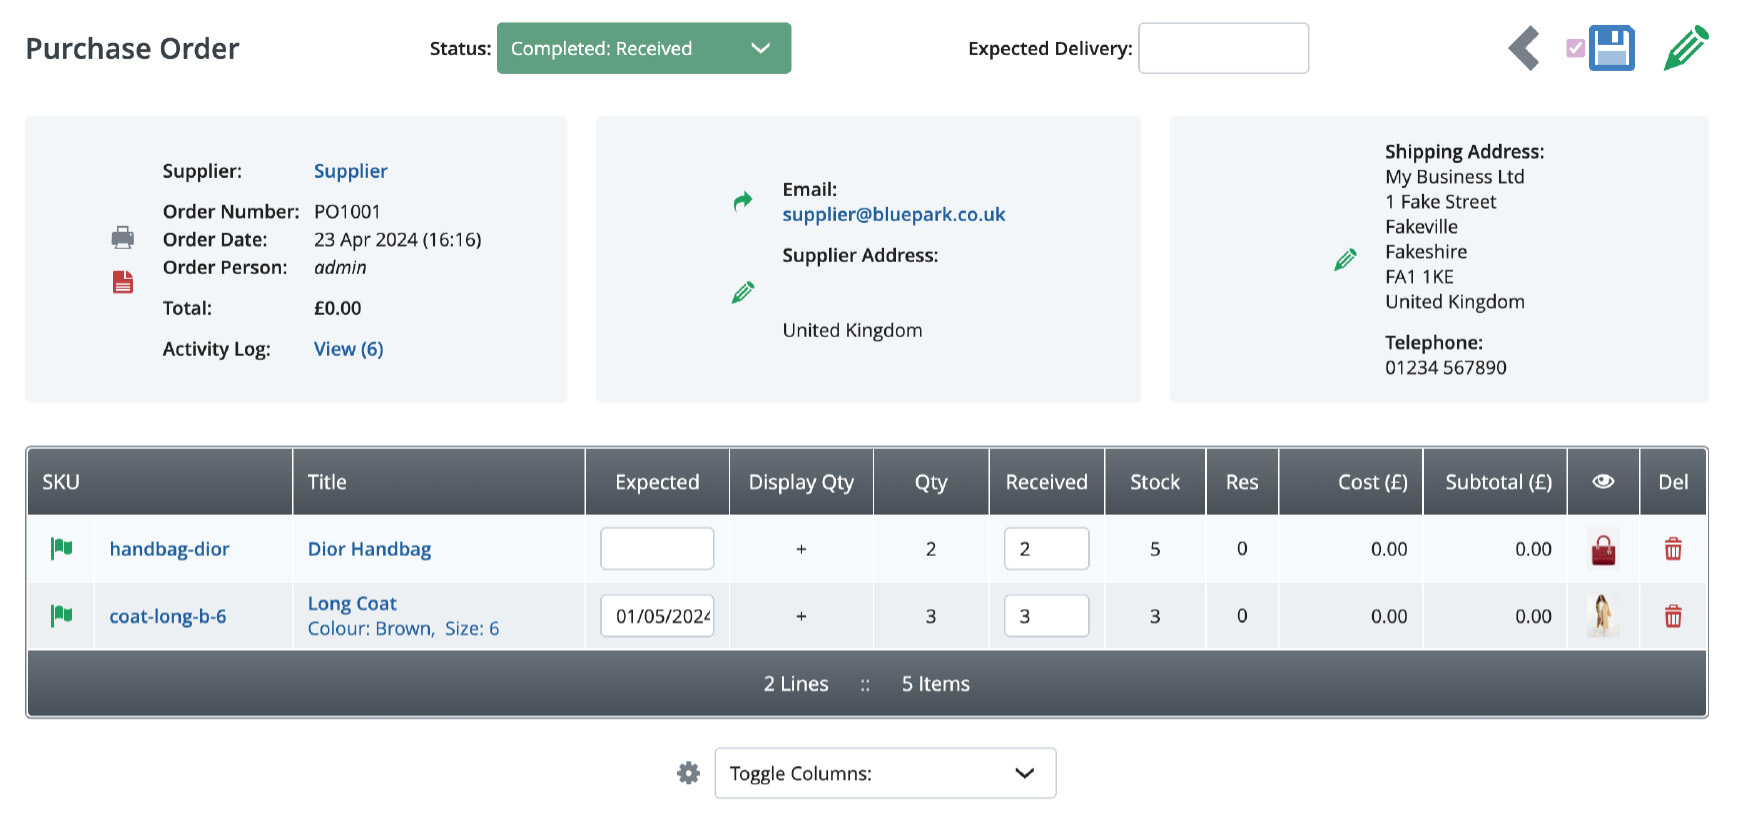
Once the stock has been received in, you can book it into the purchase order to automatically update the live stock levels. To do this on a product by product basis, just type in the number of stock received for each product within the Received column and click Save. However, if you are confident you have received everything in correctly, you can just change the Status drop-down to Completed: Received and Save.  Why you shouldn't ignore unfinished orders Never miss out on unfinished orders and get a better understanding why some visitors decide to abandon orders.  How to process returns & refunds Find out how to process your returns and refunds correctly for both your payment processor and the Bluepark platform. Try Bluepark for FREE for 14 daysFull access to everything including our support team, no card details required |
|


× Create your free trialGet started for FREE for 14 daysWe recommend building your online shop on a desktop device for the best possible experienceAlready have a free trial? Sign In Now |
|