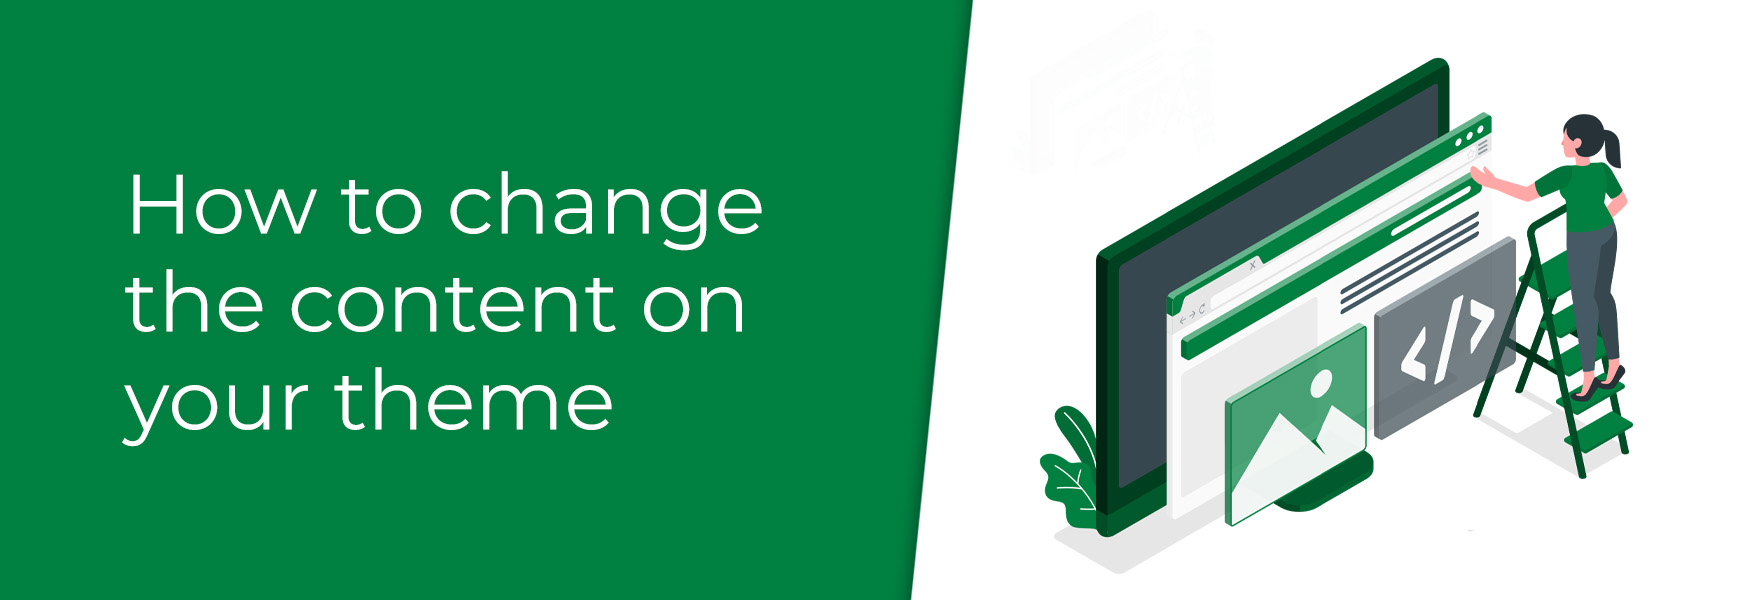
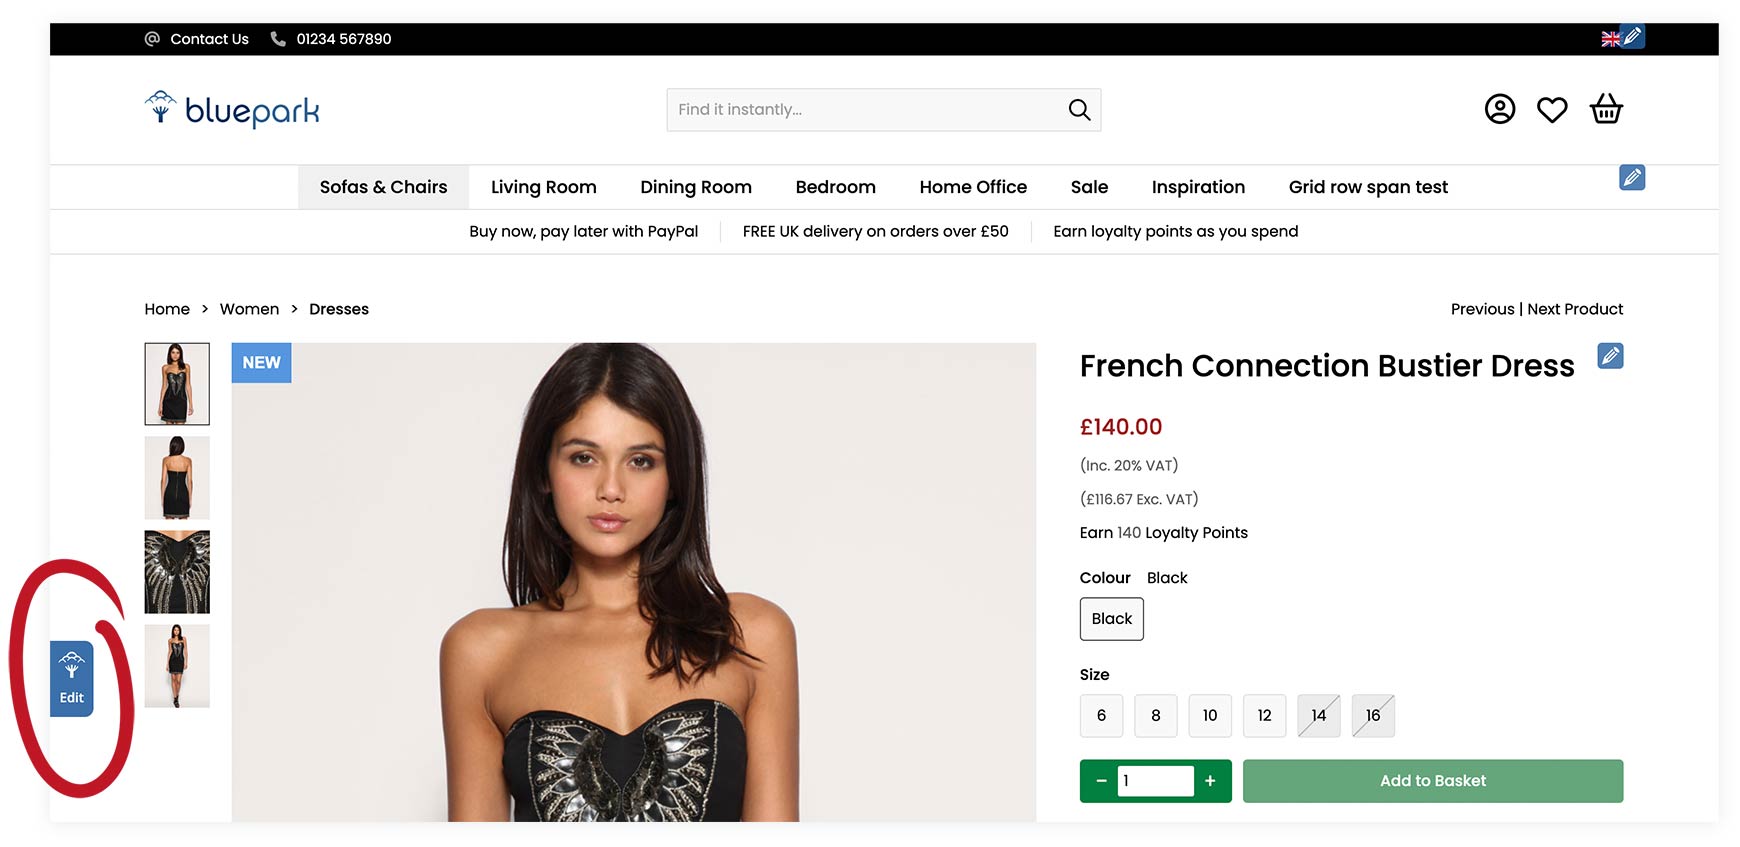
The first thing to understand about all Bluepark themes is that they do not determine the content that appears on the page. This allows you to edit your theme, or choose a completely different one, at any time without affecting the content. It also allows you to use every Bluepark built-in feature on every theme. Instead, the theme simply sits on top of the content to create a consistent, branded look. It determines the look and feel of things, such as the Header, the Footer, the buttons, and the way the links and prices are styled. It's the colours, the fonts, the spacing and the placement of certain things, rather than which images, text, products, categories and other content you may want on pages. All sections on the homepage, and indeed other pages, can be edited, moved, or deleted, and new ones can be added in as you wish, giving you much more control and flexibility. This is done by the combination of Content Blocks and Layouts. Content BlocksThe content that appears on pages, such as the homepage, is added using Content Blocks. There are a number of pre-built Content Blocks available for you use straight away, such as the Slideshow block, the Latest Reviews block, the Top Sellers block and many more. For the Product Page, there's the Customers Also Bought block and the Related Products block, amongst others. You can also use the Columns block, or create your own bespoke Content Block, and add anything to it. For instance, you can create a block for your homepage that is a section about your company. This could have two columns - a title, a small paragraph and a button layered on top of a coloured background on the left and an image on the right. Most of our Content Blocks can be set to full-width, full-width background or centre-width. It's recommended to use a mixture of these on your homepage blocks to create interest. Many Content Blocks can also be set to carousel, allowing visitors to scroll through products, blog posts, reviews and much more. Related blog postsLayoutsEach page type, such as Home page, Category page, Product page, Blog Post page, Basket and so on, has its own Layout assigned to it. To add your Content Blocks to a page type, you would simply assign the block to the Layout. For instance, if you wanted the Related Products block to appear on all products, you would just assign that block to the Product Page layout and the block will automatically appear. You can switch columns on and off within the Page Layout. So, if you simply wanted every page on the website to be a single column, you would untick the Display Left Column and Display Right Column options in each Layout. All Content Blocks would then just be assigned to the Main Column. Edit the content via the websiteYou can add your Content Blocks to a Layout via the website itself using the on-site editing system. If you log into your admin panel and click on the View Site button at the top right, the site will open and you will see the blue Edit button on the left of the site (black Edit bar across the top on V1 themes). Within here you will be able to Add, Edit and Move Content Blocks on the page.
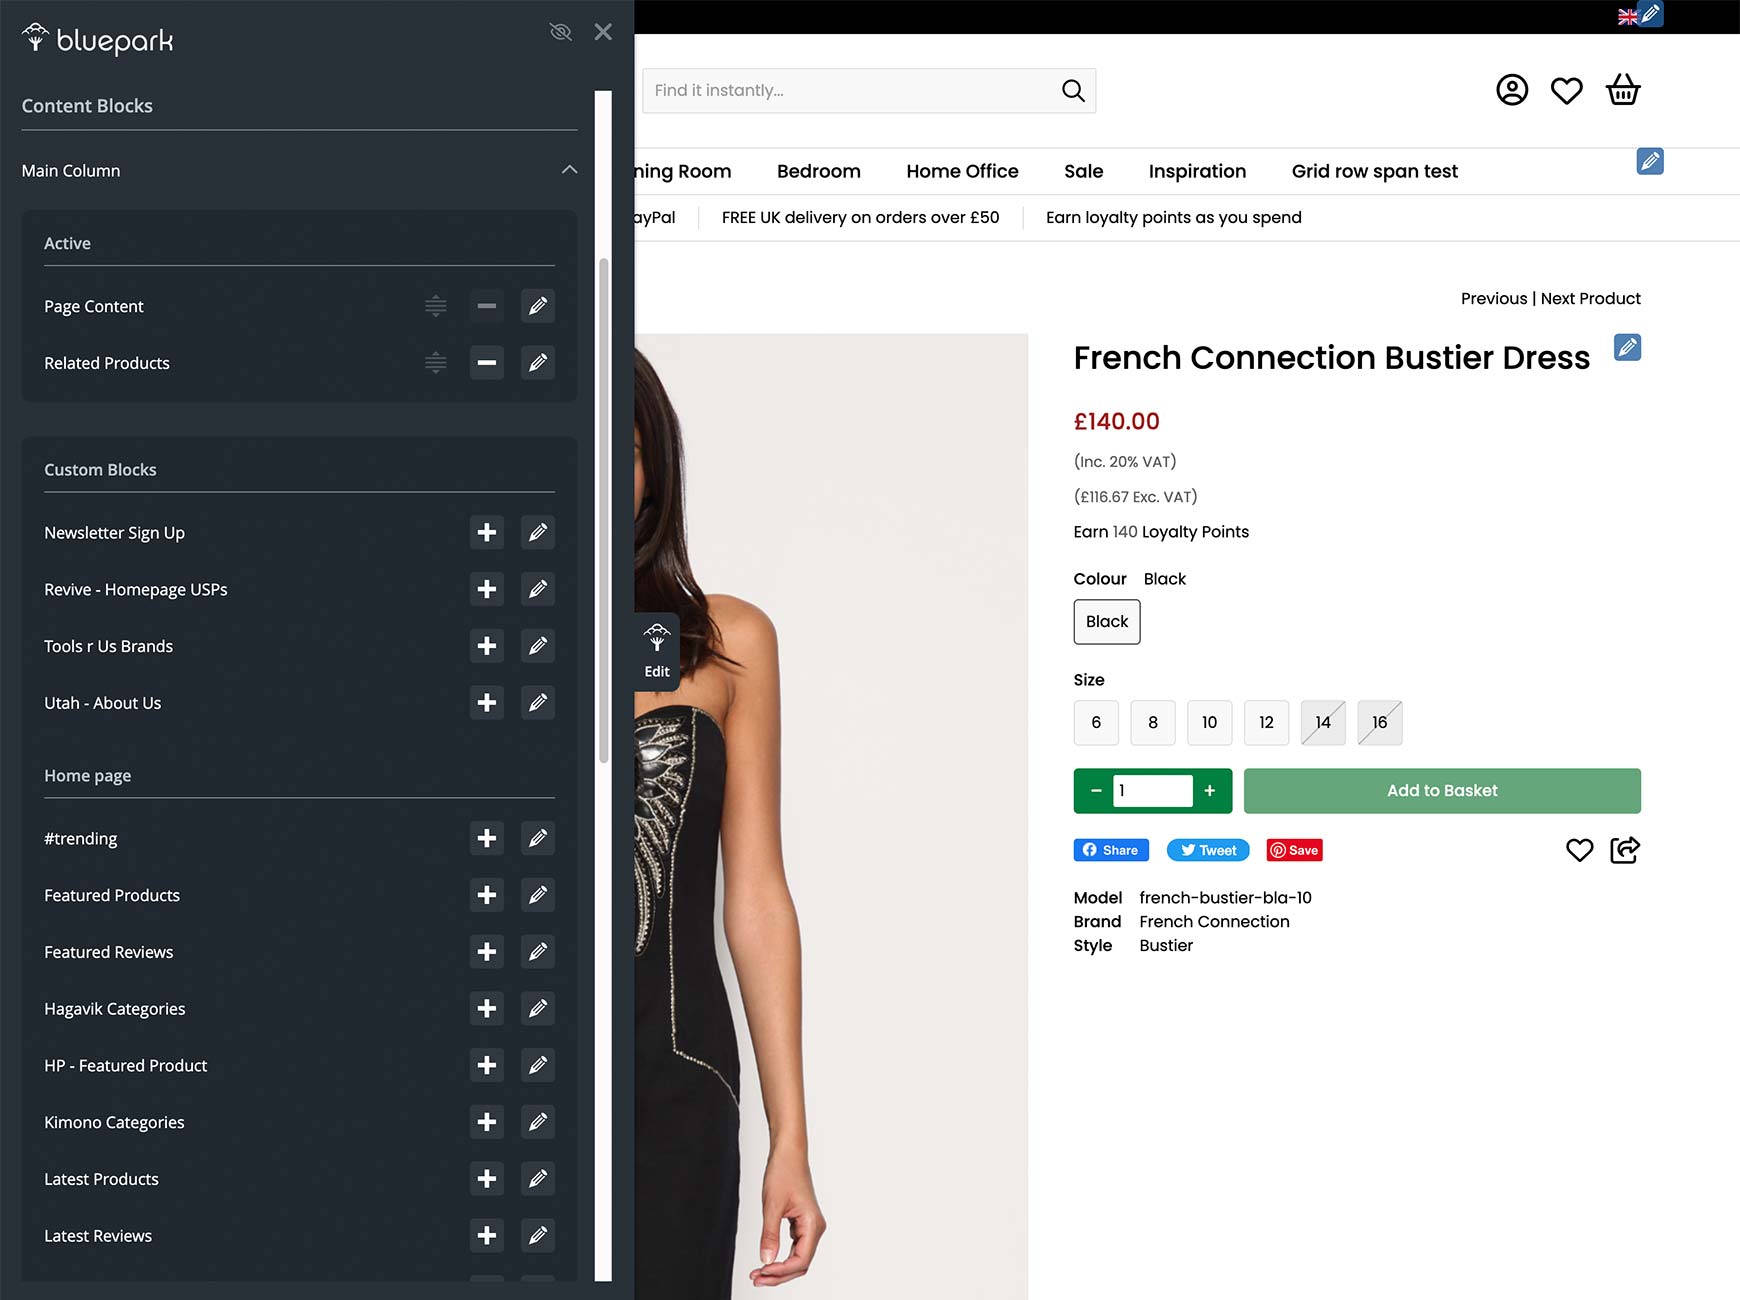
The Edit area will list which Page Type (only on V2 themes), Theme, Page Layout and Content Blocks are assigned to the page you're looking at. For instance, on a Product page you would see the Layout change to Product Page and you can then see which Content Blocks are assigned to each column on the page within the Content Blocks section (Blocks on V1 themes).
If you wanted to remove a particular Content Block, you would click on the Minus button (Remove on V1 themes) to the right of its listing and if you wanted to add a particular Content Block, you would click on the Add button to the right of its listing. You can also edit the block by clicking on the Edit button. If you add a new Content Block to the Layout, it will automatically appear at the bottom of the page. You can then use the Drag button in Content Blocks list to move it wherever you want it to display. (On V1 themes you would do this via the Up and Down arrows icons on the top right of the actual block on the page.
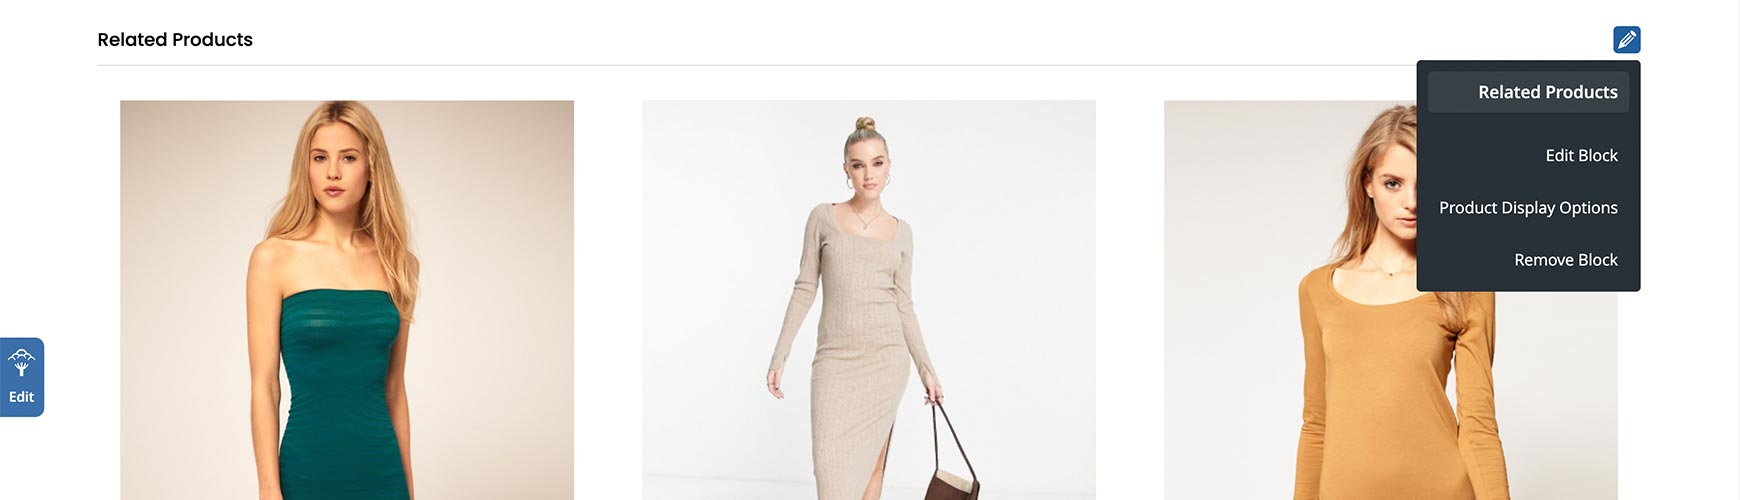
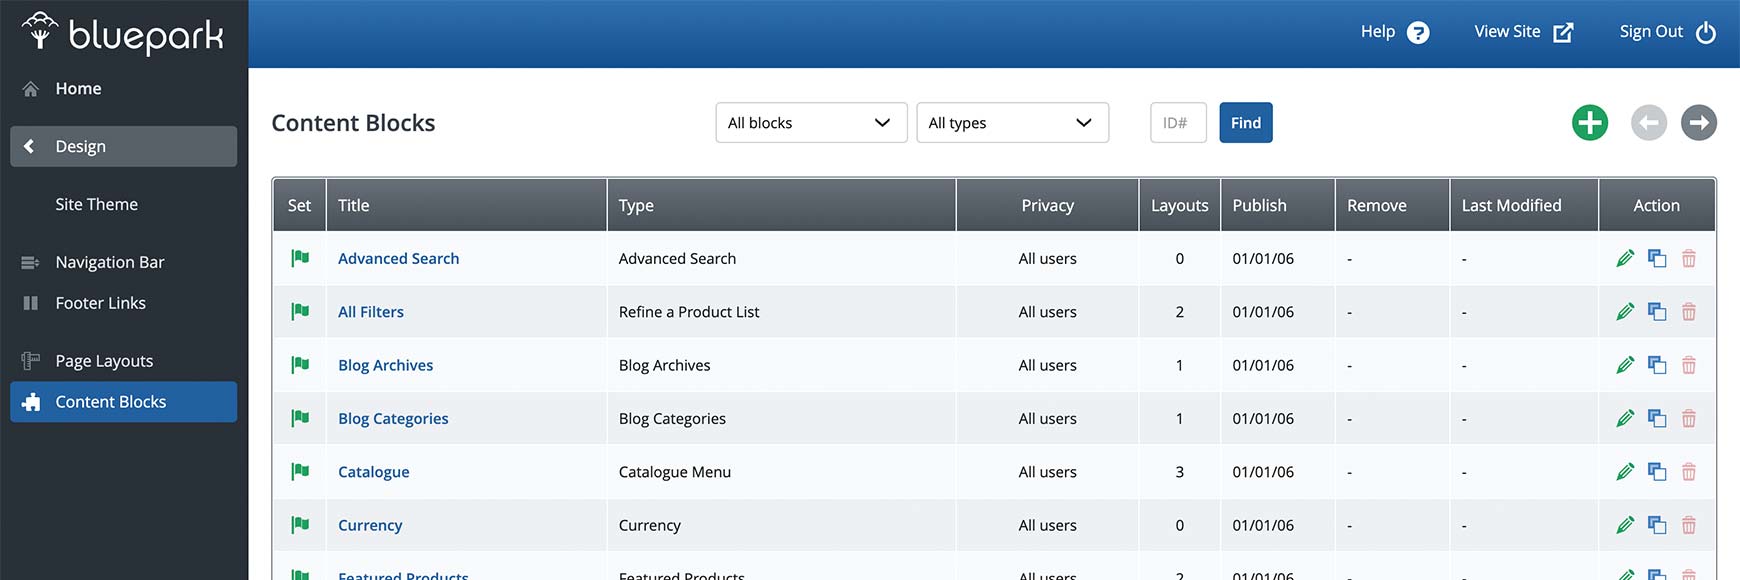
You can then edit the block either via the Content Blocks list or by clicking on the Edit icon at the top right of the Content Block on the page. Please note: only admins can see the on-site editing features on the site. Customers will not see the Edit button on the left (black bar at the top on V1 themes) or the Edit icons on the page. Edit the content via the admin panelIf you would prefer to manage your Layouts and Content Blocks within the admin panel, you would simply go to Design / Layout where you will find Page Layouts and Content Blocks within the menu.
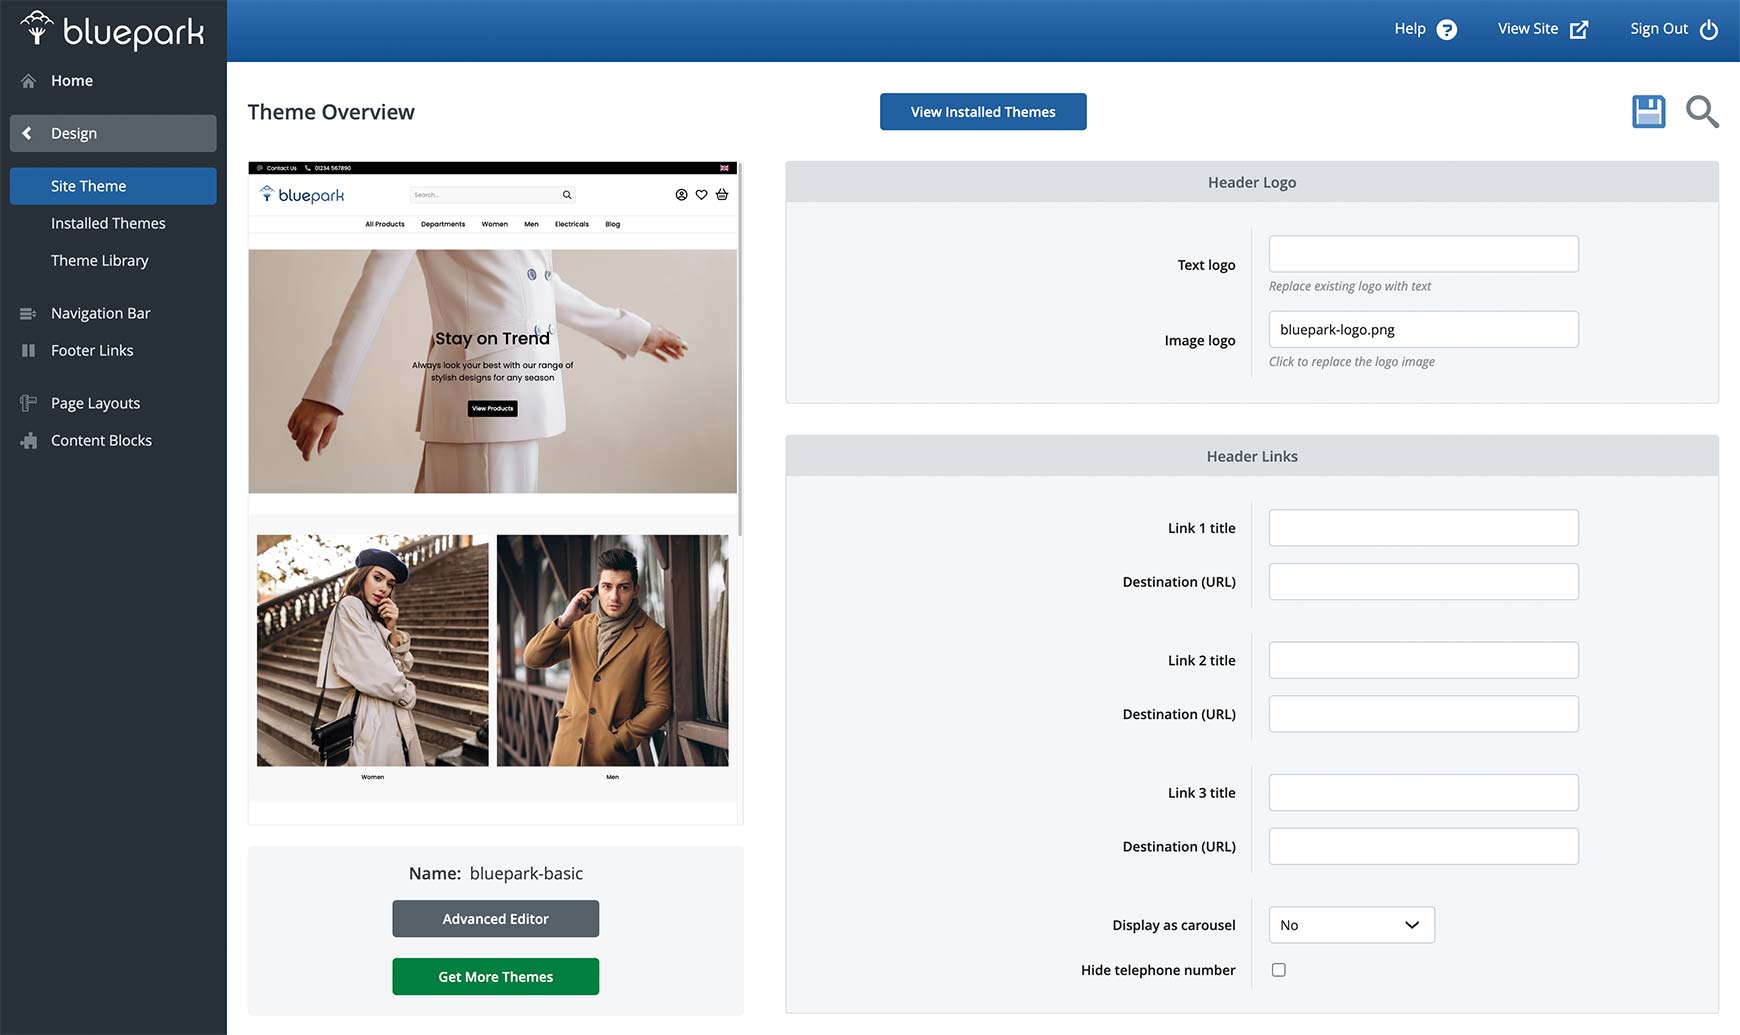
In Content Blocks, you can make a copy of any of the blocks already listed, create a new block or edit ones that already exist. In Page Layouts, you can switch columns on and off, as well as assigning, unassigning and moving Content Blocks within the relevant column. You can also edit a Content Block directly from the Layout by clicking on its name. Update the HeaderThere are a number of header options within the Theme Overview to allow you to change the logo, add promotional header links, choose whether you want the links displayed as a carousel and if you wish to hide the telephone number. The currency and language options will also automatically appear within the header on most V2 themes as soon as you switch these on within the Settings menu in the admin panel.
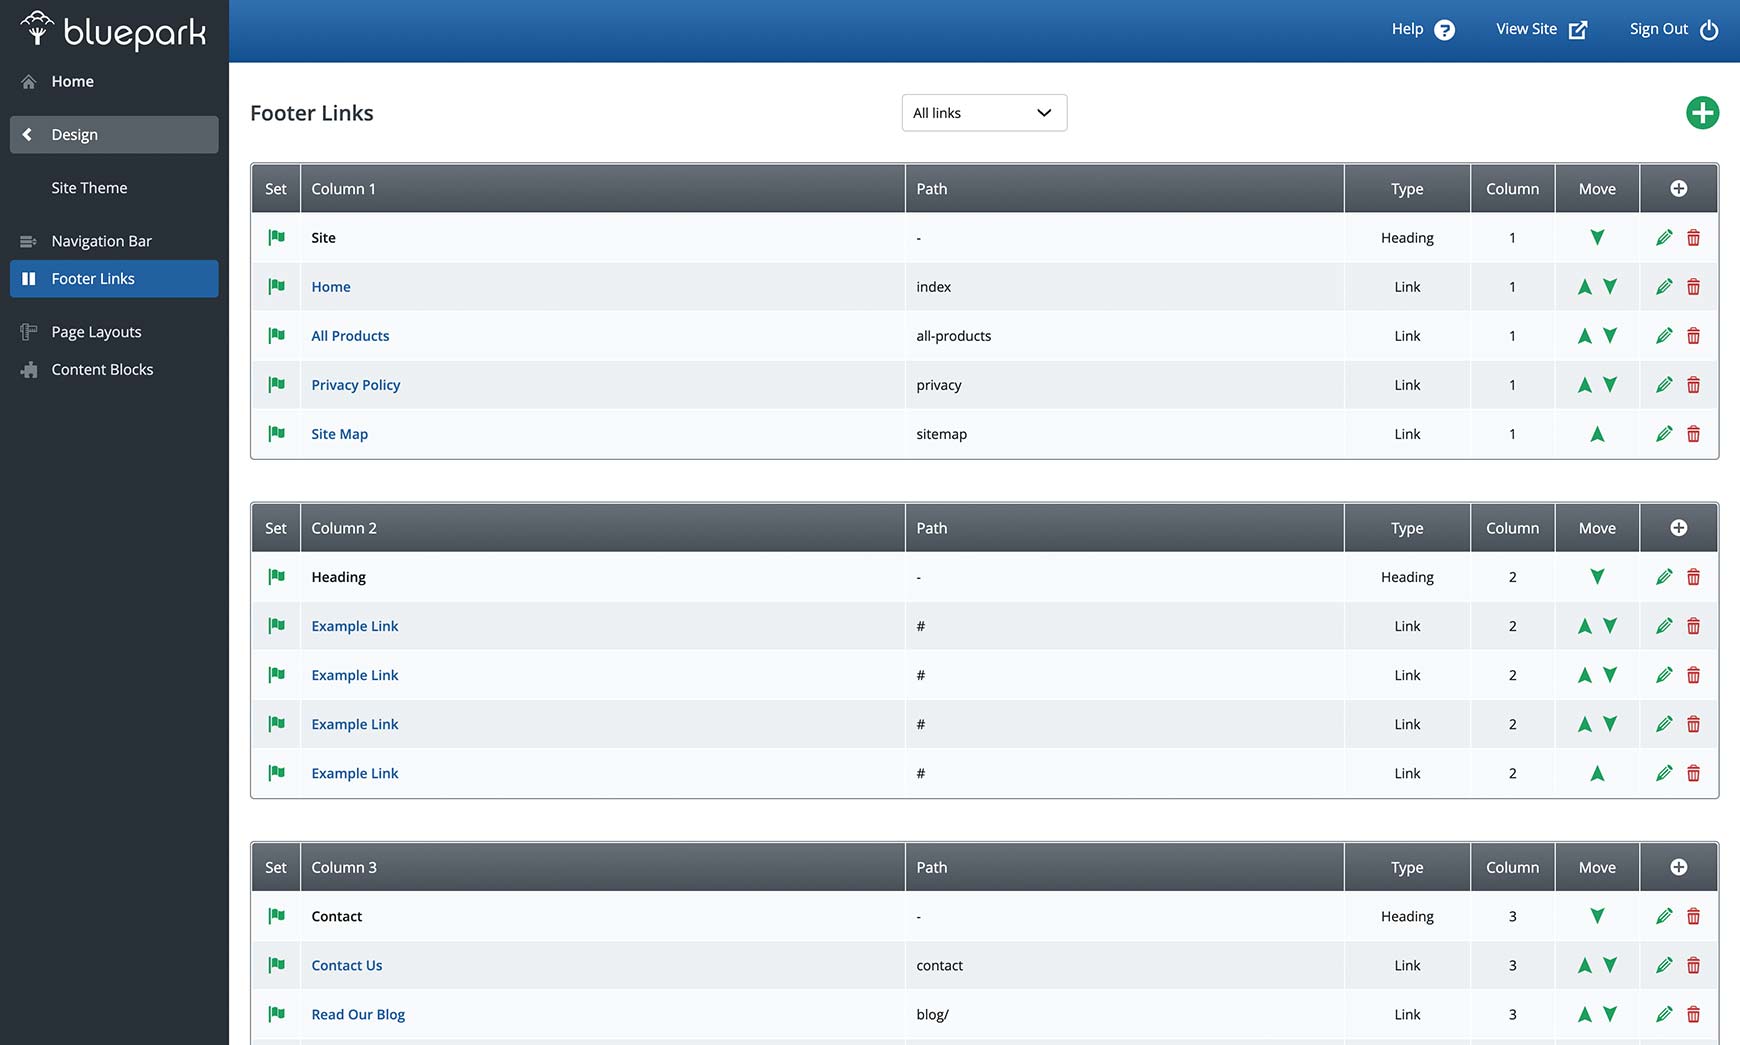
Update the FooterFooter links are edited via Design > Footer Links. You can create up to five columns, which will automatically fit within the footer area on all devices. For each column you can create a Header, Links, insert social media icons and a form, such as the Email Newsletter form. If you wish to just add text, such as your address, simply choose Link and don't add a URL.
To ensure your theme shows the correct social media icons, go to Settings > Integrations > Social Media tab and add in the URLs for your social media profiles. Any that are left blank won't then show as an icon within the Footer. Advanced usersBlock IDs and classesEvery Content Block has its own unique ID to allow you to target just that block within the Additional CSS field of the theme. The block's Title and Content also has a class assigned to them. This changes depending on which column the block is in. For instance, the block Title's class in the Main column is .cb_title and in the left column it is .lb_title. Each Content Block type also has its own type class. For instance, the Latest Reviews block has the class of block_latest_reviews and every time you make a copy of the Latest Reviews block, each one will have that same class. This allows you to target every instance of a particular block type. You can also add your own class to each block, should you wish, within the Tags tab. Layout classesYou can also add your own unique class to each Layout if needed. This will allow you to create a Layout for a particular page and target specific areas just on any page that has that Layout assigned to it. Block variablesEvery block has a unique Variable that can be added anywhere within the HTML of a page or theme to insert the block into that area. For instance, you may have a Google Maps block of the location of the business and you want to have it display in the Footer. This would be inserted by simply adding the Block Variable into the Footer Content field in the theme where you want it to appear. You can add a DIV, with a class assigned to it, around the Block Variable in order to style it however you wish. The CSS can then be added to the Additional CSS field within the theme. Please note: by using a Block Variable, the Block Title doesn't display - this only appears when you add the block to a Layout. If you wish to add a title to a block that's been inserted using a Variable, you will need to add this yourself within the HTML. Page TypesEach Page Type, such as homepage, product page, basket page and so on, has its own Page Type class set within the container DIV of the Body tag. For instance, all product pages have the Page Type class of .type_product. This can then be used to target blocks and content within every occurrence of that Page Type on the site. If you have questions about editing or adding content to your online shop, just let us know below. Recommended reads How to change the default colours on a theme Each of our themes comes designed with certain colours. However, it's very quick and easy to change these in order to match your brand and create a unique theme.  Add unique fonts to your site with Google Fonts Choose from any of Google's hundreds of fonts and quickly add them to your theme to make your online shop look unique to your brand. Try Bluepark for FREE for 14 daysFull access to everything including our support team, no card details required |
|


× Create your free trialGet started for FREE for 14 daysWe recommend building your online shop on a desktop device for the best possible experienceAlready have a free trial? Sign In Now |
|