One of the most important steps to take once your new online shop is up and running is to make sure Google can see it. The quickest way to achieve this is by submitting your sitemap to them so they are aware you exist. This is done by connecting your online shop with Google's Search Console, formerly known as Webmaster Tools. By connecting to Search Console you will be able to monitor certain areas of your website such as search queries, links to your site, mobile usability, index status and much more. It's a free service that only you as the site owner or authorized user can access for your website, so it's well worth spending a little time exploring everything. Please note: If you are moving your site over from another platform, it is advisable not to make any changes until 48 hours after you've gone live to ensure Google can access the new site. Verifying your websiteThe first thing you need to do is verify your site. You can do this by following the steps below: Step 1 - Create a Google Search Console accountGo to https://www.google.com/webmasters/tools/home and log in with a Google login. If you don't already have a Google account, such as Gmail or YouTube, then you will need to create one. Step 2 - Add a property
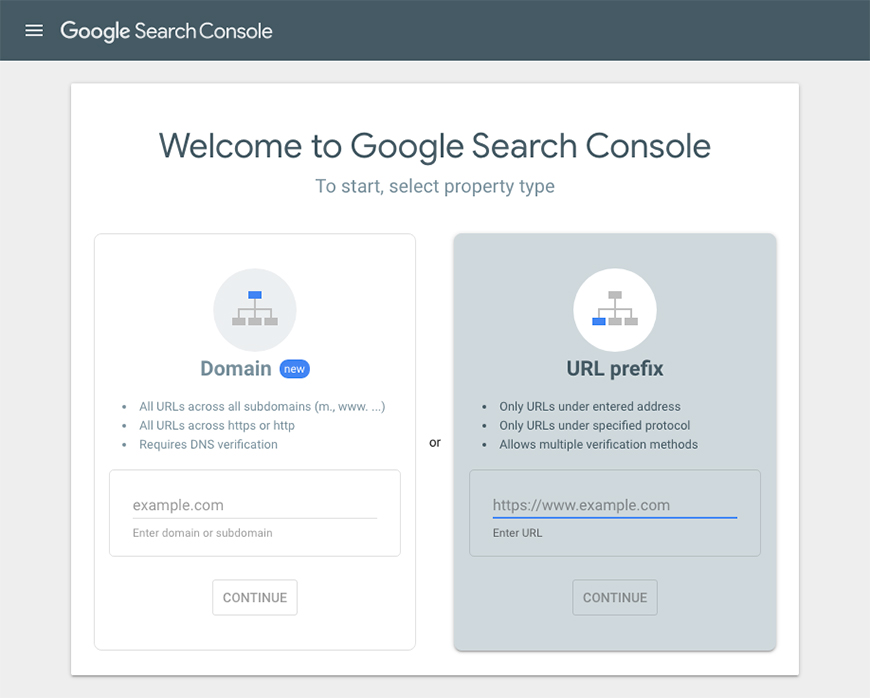
In the URL prefix section type in your domain name. Your domain name should be with the http:// at the beginning if you are not using full site SSL or https:// if you are using full site SSL. Make sure you also include the www. For example - https://www.mydomain.co.uk Step 3 - Verify your website
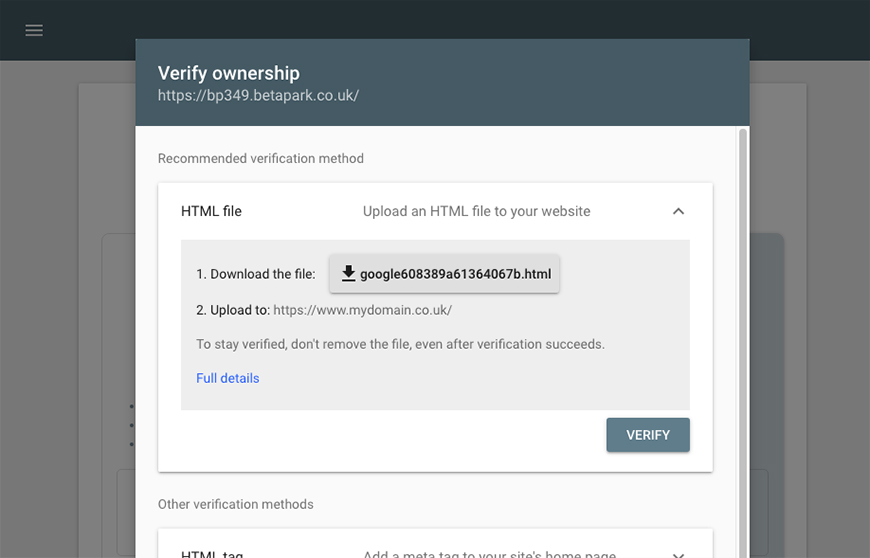
Click the Continue button and make a note of the HTML verification file name shown in the 'Download the file' line. It will look similar to one highlighted above. Don't download the file or continue on further. Step 4 - Add verification file to website
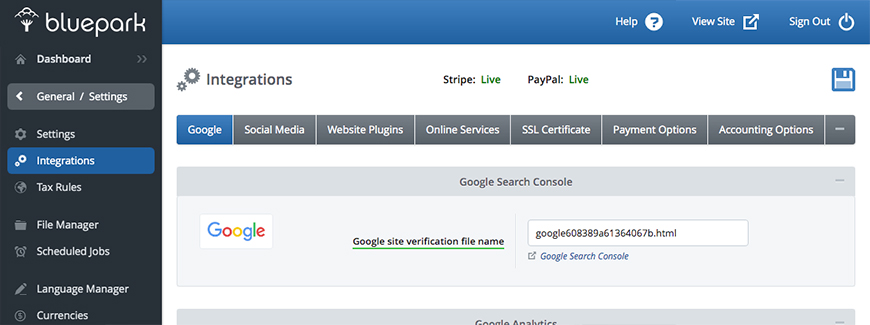
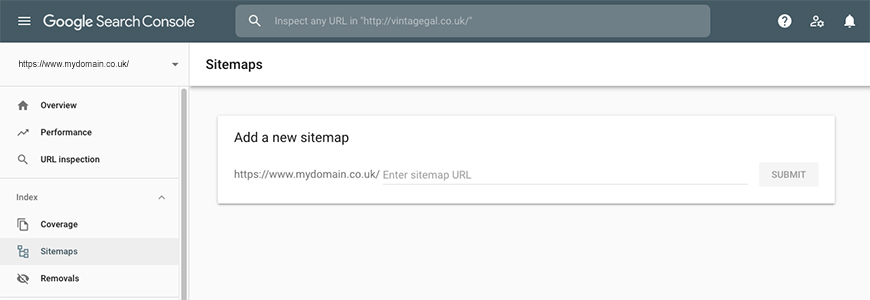
Go to your website's admin console and type the file name into General / Settings > Integrations > Google > Google Site Verification File field and save. Step 5 - Check the verificationIn Google Search Console click on the Verify button. It will then confirm the verification has been successful. Submitting your sitemapOnce you've verified your site you can submit your sitemap to Google. This will allow their system to crawl all of the live URLs on your website. Once this process has run through Google will be able to start indexing all of your pages.
Once your sitemap has been submitted Google will automatically continue to crawl it to make sure it keeps up with any content changes or new pages added. This means there is no reason to resubmit your sitemap every time you make a change. In the Coverage section of the Search Console you will gradually start to see the number of web pages on your site that have been submitted to Google and the number they have indexed. Generally the indexed number is less than the number submitted. This can be for a number of reasons such as paginated pages controlled through canonical tags, the content of the page not being relevant, or is not considered quality content or even violates Google's guidelines. To find out more about how to make sure your pages are indexed please read Google's Webmaster Guidelines. Try Bluepark for FREE for 14 daysFull access to everything including our support team, no card details required |
|


|