 If you're still unsure about Instagram, then have a think about the 130 million people who tap on an Instagram shopping post to learn more about products every single month. That's a huge market you can easily reach out to simply by connecting the products on your website to your Instagram account. Alongside the Facebook Product Feed, available within your online shop's admin panel, we've created a helpful guide to get you selling on Instagram. Please note: Meta no longer allows businesses in countries outside of the US to create Facebook or Instagram shops, or use any of the features this included. However, you can use the products you upload to Facebook Business Manager within dynamic product ads on both Facebook and Instagram. You will need to follow the below steps to do this. Get your account ready for Instagram shoppingStep 1: Confirm eligibilityIn add your products for use on Instagram, there are three conditions you must meet to confirm your eligibility to Instagram. Your business must be located in a supported market. The UK and the US are included but for other countries, please see their full list here. Your business must primarily sell physical goods. So, if you only sell downloadable items, you will not be eligible. Your business must comply with Instagram's Merchant Agreement and Commerce Policies. We recommend having a good read of these before getting started. Step 2: Convert to a business accountYou cannot add products to a personal Instagram account, so you must ensure your account is set to a Business account. 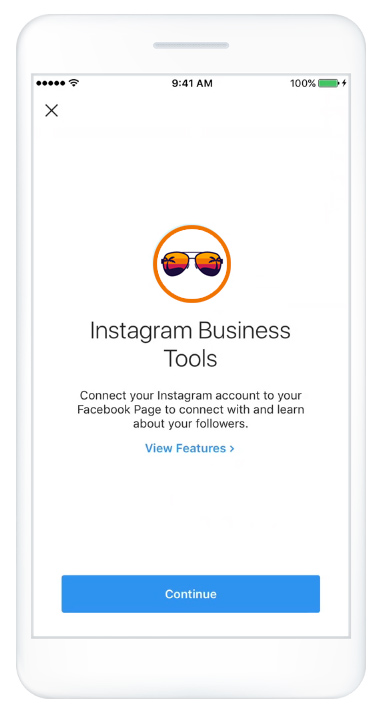 It's easy to quickly check if your account is a personal or business one by simply clicking on the Edit Profile button on your profile page. If there is a link that says Switch to Professional Account, then the account is a personal one. To switch to a business account, click on the link and choose Business. Proceed through the steps to specify which category your shop belongs in and adding your contact information. Find out more on Instagram's help guide. Step 3: Connect your Facebook pageIn order to tag your products on Instagram, you must have a Facebook Page and you must be an admin of that page. Once these are confirmed, you then need to connect your Instagram Business Account to your Facebook Page. This can be done during the switch process as outlined above or by following the steps below.
If the Facebook Page you'd like to connect to doesn't appear in the Page list, it may be because you're not an admin of that Page. Check the Page's settings and make sure you have permission to add that page to your Instagram business account, then try again. 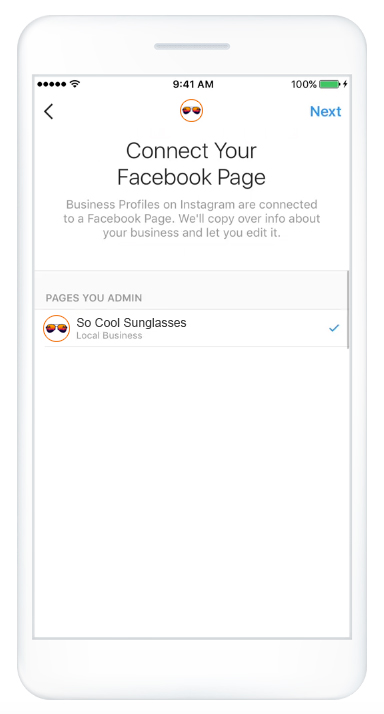 Upload your productsOnce your Instagram profile is setup, the next step is to upload your products, so they can be tagged on your posts. To do this, they must be uploaded to Facebook Catalogue Manager. To do this, please follow the steps in our How To Setup A Facebook Shop guide below. Recommended reads Find out how to create a Facebook Business Account, setup a product upload to Facebook using our built-in Facebook feed for use with dynamic product ads for your brand.  How to use Instagram to boost your sales With over 1 billion monthly users, Instagram holds a lot of potential for attracting new customers. Have a read of our helpful guide to find out how it can work for you. Try Bluepark for FREE for 14 daysFull access to everything including our support team, no card details required |
|

× Create your free trialGet started for FREE for 14 daysWe recommend building your online shop on a desktop device for the best possible experienceAlready have a free trial? Sign In Now |
|